
Аннотация
Выбор небольшой электрической тали - важное решение для мастерских, производственных предприятий и строительных площадок, напрямую влияющее на эффективность работы, безопасность и производительность. В этом документе рассматриваются многогранные соображения, необходимые для приобретения подходящего подъемного устройства. Он выходит за рамки элементарных оценок грузоподъемности и переходит к более тонкому анализу таких факторов, как номинальный рабочий цикл, который определяет выносливость подъемника' для прерывистой или продолжительной работы. Дальнейшее исследование охватывает разнообразие методов подвески, от универсальных крюковых креплений до интегрированных систем тележек, и их пригодность для различных пространственных конфигураций. Оценка распространяется на критические механизмы безопасности, включая концевые выключатели, защиту от перегрузки и дублирующие тормозные системы, которые являются основой для снижения опасности на рабочем месте. Сравнительный анализ подъемных средств, систем управления и конфигураций электропитания создает основу для согласования технических характеристик подъемника с конкретными требованиями пользователя. В исследовании также рассматривается необходимость соответствия оборудования условиям эксплуатации с учетом защиты от попадания твердых частиц и влаги, что обеспечивает долговечность и надежность работы.
Основные выводы
- Подберите грузоподъемность подъемника'в соответствии с вашими требованиями к самому тяжелому, а не среднему подъему.
- Проанализируйте номинальный рабочий цикл, чтобы убедиться, что двигатель способен выдержать вашу частоту работы.
- Выберите тип подвеса - крюк, проушина или тележка - в соответствии с планировкой вашего рабочего пространства.
- Отдавайте предпочтение подъемникам с комплексными функциями безопасности, такими как концевые выключатели и защита от перегрузки.
- Выбирая подходящую электрическую таль, учитывайте ее систему управления и потребности в электроэнергии.
- Оцените условия эксплуатации, чтобы выбрать соответствующий рейтинг IP для обеспечения долговечности.
- Регулярно осматривайте и обслуживайте подъемник, чтобы гарантировать его долговременную безопасность и работоспособность.
Оглавление
- Понимание грузоподъемности и скорости подъема: основополагающий выбор
- Расшифровка характеристик рабочего цикла и двигателя: Сердце выносливости
- Навигация по вариантам подвесов и креплений: Интеграция в ваше пространство
- Приоритетные функции безопасности: Ваша первая линия обороны
- Исследование средства подъема: Цепь против каната для небольших подъемников
- Системы управления и электропитания: Пользовательский интерфейс
- Оценка экологических и прикладных потребностей
- Широкая подъемная экосистема: Стропы, зажимы и опорные конструкции
- Монтаж и ввод в эксплуатацию: Методический подход
- Режимы технического обслуживания и осмотра: Максимальный срок службы и безопасность
- Часто задаваемые вопросы (FAQ)
- Заключение
- Ссылки
Понимание грузоподъемности и скорости подъема: основополагающий выбор
Приступая к выбору небольшой электрической тали, необходимо иметь представление о двух ее наиболее важных характеристиках: сколько груза она может поднять и как быстро это сделать. Эти параметры, грузоподъемность и скорость подъема, - не просто цифры в спецификации; они определяют полезность инструмента в конкретном производственном контексте. Ошибка в расчетах может привести либо к недостаточно мощному и небезопасному оборудованию, либо к чрезмерно дорогому. Наше исследование начинается здесь, поскольку правильное понимание этих понятий освещает путь к мудрому и эффективному выбору. Подумайте об этом, как о закладке фундамента для дома. Без прочного, правильно рассчитанного основания все, что на нем построено, окажется под угрозой.
Определение максимальной нагрузки: за гранью очевидного
Термин "грузоподъемность" означает максимальный вес, который подъемник сертифицирован для безопасного подъема. Часто это первая, а иногда и единственная характеристика, на которую обращает внимание потенциальный покупатель. Однако поверхностный подход может оказаться опасным. Главная задача заключается не в определении среднего веса, который вы поднимаете, а в определении абсолютного максимального веса, который вам когда-либо придется поднимать, даже если это будет происходить нечасто. Человеку свойственно недооценивать, мыслить категориями типичного дня. Я призываю вас не поддаваться этому порыву. Вместо этого проведите тщательный аудит своих операций. Какую самую тяжелую деталь вашим механикам приходится извлекать из блока двигателя? Каким самым тяжелым набором штампов приходится маневрировать в вашем инструментальном цехе? Какую самую массивную пачку сырья когда-либо обрабатывал ваш отдел приемки?
Ответ на этот вопрос определяет минимально необходимую грузоподъемность. Фундаментальный принцип безопасного подъема, закрепленный в нормативных актах таких организаций, как Управление по охране труда и здоровья (OSHA), заключается в том, чтобы никогда не превышать номинальную грузоподъемность подъемника (OSHA, n.d.-b). Даже однократное превышение может привести к катастрофической поломке из-за чрезмерной нагрузки на критически важные компоненты, такие как цепь, крюк, шестерни или моторный тормоз. Повреждения могут быть не сразу заметны, но могут образоваться микроскопические трещины от напряжения, создавая скрытую уязвимость, которая может привести к поломке при последующем, гораздо более легком подъеме.
Поэтому необходимо заложить запас прочности. Если ваш абсолютный максимум подъема рассчитан на 450 килограммов, выбор подъемника грузоподъемностью 500 килограммов - разумное и ответственное решение. Вы покупаете не просто грузоподъемность, вы покупаете душевное спокойствие и запас прочности на случай непредвиденных обстоятельств или незначительных ошибок в расчете веса груза. Учитывайте также динамику подъема. Груз, поднятый резко или раскачивающийся, может оказывать усилие, намного превышающее его статический вес. Надежная грузоподъемность помогает воспринимать эти динамические нагрузки.
Нюансы скорости подъема: Производительность против точности
Скорость подъема, обычно измеряемая в метрах в минуту (м/мин) или футах в минуту (ф/мин), определяет темп ваших операций. Более высокая скорость может напрямую повлиять на повышение производительности. В условиях повторяющихся производственных линий экономия нескольких секунд на каждом подъеме может дать значительный выигрыш за смену. Представьте себе процесс сборки, в котором компонент поднимается, позиционируется и опускается сотни раз в день. Подъемник, движущийся со скоростью 8 м/мин, по сравнению с подъемником, движущимся со скоростью 4 м/мин, может почти вдвое сократить время ожидания подъемника, что напрямую повысит производительность.
Однако скорость не всегда является первостепенным достоинством. В областях применения, требующих деликатного позиционирования, высокая скорость подъема может стать помехой. Рассмотрим задачу опускания многомиллионного оборудования для медицинской визуализации в подготовленное пространство или аккуратной установки прецизионной пресс-формы в пресс. Здесь контроль - это все. Слишком быстрый подъемник может затруднить оператору выполнение необходимых тонких настроек, увеличивая риск столкновения и повреждения. Внезапная остановка с высокой скорости также может привести к опасному раскачиванию груза.
Именно поэтому многие производители предлагают двухскоростные подъемники. Эти сложные машины обеспечивают как высокую скорость для быстрого преодоления пустых расстояний, так и гораздо более медленную, "ползучую" скорость для последних, точных моментов размещения. Оператор может переключаться между скоростями с помощью двухступенчатой кнопки на подвесном пульте управления. При первом нажатии активируется медленная скорость, а при полном нажатии - высокая скорость. Эта двойная функциональность предлагает лучшее из двух миров: эффективность скорости и безопасность точности. Оценивая небольшую электрическую таль, не просто спрашивайте: "Насколько она быстра?". Спросите: "Соответствует ли скорость характеру работы, которую я буду выполнять?" Для многих двухскоростная модель, хотя и немного дороже, представляет собой гораздо более универсальную и ценную долгосрочную инвестицию.
Однолинейная и двухлинейная работа: Объяснение компромисса
Многие небольшие электрические тали оснащены функцией, которая позволяет настроить их на работу в однолинейном или двухлинейном режиме (также известном как "два падения"). Понимание этого выбора крайне важно, поскольку он создает прямой компромисс между мощностью и скоростью/высотой подъема.
Представьте себе подъемную цепь или канат, идущий непосредственно от барабана подъемника вниз к грузовому крюку. Это однолинейная работа. Теперь представьте цепь, идущую от тали, вниз через блок шкивов на крюке, а затем обратно к точке крепления на корпусе тали'. Это двухлинейная конфигурация.
Механический принцип работы - это эффект шкива. Используя две нити цепи для поддержания нагрузки, вы фактически удваиваете грузоподъемность тали'. Такелаж, рассчитанный на 250 кг при однолинейной установке, может быть рассчитан на 500 кг при двухлинейной установке. Это невероятно полезная функция, позволяющая одному легкому подъемнику выполнять более широкий круг задач.
Однако это увеличение мощности не дается даром. Компромисс заключается в снижении вдвое как скорости подъема, так и максимальной высоты подъема. Поскольку для подъема груза на один метр вы теперь тянете через лебедку два метра цепи, крюк движется с вдвое меньшей скоростью. Аналогично, поскольку цепь удваивается, общее вертикальное расстояние, которое может пройти крюк, прежде чем блок шкивов встретится с корпусом тали, сокращается вдвое.
Выбор, таким образом, зависит исключительно от ваших приоритетов. Если ваша главная задача - быстрый подъем легких грузов на большую высоту (например, подъем предметов с первого этажа на антресоль), то лучше использовать однолинейную конфигурацию. Если ваша основная задача - подъем одного очень тяжелого предмета в мастерской с достаточным пространством над головой, где скорость имеет второстепенное значение (например, для вытягивания двигателя), то правильным подходом будет перестановка лебедки для работы с двумя линиями. Многие пользователи используют лебедку в однолинейной конфигурации для выполнения повседневных задач, но ценят возможность перенастроить ее для одного тяжелого подъема, который они выполняют раз в несколько месяцев.
| Характеристика | Работа по одной линии | Двухлинейное управление |
|---|---|---|
| Грузоподъемность | Стандартный (например, 250 кг) | Удвоенный (например, 500 кг) |
| Скорость подъема | Стандартный (например, 8 м/мин) | Уменьшено вдвое (например, 4 м/мин) |
| Высота подъема | Максимальный (например, 12 м) | Порезанный пополам (например, 6 м) |
| Основной пример использования | Быстрые, продолжительные подъемы легких грузов | Медленные, точные подъемы тяжелых грузов |
| Механическая установка | Цепочка идет прямо к крючку | Цепь проходит через шкив на крюке |
Расшифровка характеристик рабочего цикла и двигателя: Сердце выносливости
Если грузоподъемность - это сила тали, то рабочий цикл - это ее выносливость. Это, пожалуй, самая важная и наиболее часто неправильно понимаемая характеристика при выборе электрической тали. Выбор тали с несоответствующим рабочим циклом для вашей задачи сродни участию марафонца в серии спринтов на 100 метров - или наоборот. Результат - преждевременный выход из строя, длительные простои и разочарование в работе. Двигатель и связанные с ним компоненты составляют сердце подъемника, и понимание его характеристик выносливости имеет первостепенное значение для обеспечения длительного и продуктивного срока службы.
Что такое рабочий цикл? (FEM/ISO Ratings)
Во время работы двигатель подъемника выделяет значительное количество тепла. Рабочий цикл - это показатель, определяющий способность двигателя работать и отводить это тепло в течение определенного периода времени без повреждений. Это не просто продолжительность непрерывной работы подъемника; это более тонкий показатель, включающий время работы, количество запусков в час и спектр нагрузки.
Чтобы стандартизировать эти рейтинги, международные организации, такие как Европейская федерация менеджмента (FEM) и Международная организация по стандартизации (ISO), создали системы классификации. Часто можно увидеть подъемники с такими обозначениями, как "FEM 2m" или "ISO M5". Это не произвольные коды, они передают точную информацию о предназначении подъемника'.
Давайте'разберем типичный рейтинг FEM, например "2m":
- Номер (группа механизмов): Эта часть (например, '2') указывает на спектр нагрузок, или как часто подъемник должен поднимать грузы, близкие к его максимальной мощности. Низкое число (например, 1) относится к подъемникам, которые редко поднимают тяжелые грузы, а более высокое число (например, 3 или 4) - к подъемникам, которые постоянно работают на пределе или близко к пределу своих номинальных возможностей.
- Письмо (группа "Оперативное время"): Эта часть (например, 'm') указывает на среднесуточное время работы.
Так, подъемник с рейтингом FEM 2m предназначен для среднего спектра нагрузок (подъем смеси легких, средних и тяжелых грузов) и определенного среднего ежедневного использования. Подъемник с более высоким рейтингом, например FEM 3m, подходит для того же времени работы, но с более тяжелым спектром нагрузок - более частыми тяжелыми подъемами.
Более простая, хотя и менее точная метрика, которую часто указывают производители, - это процентная оценка за определенный период времени, например "рабочий цикл 25% за 10 минут". Это означает, что двигатель может работать в общей сложности 2,5 минуты в течение любого 10-минутного периода и должен отдыхать в течение оставшихся 7,5 минут, чтобы остыть. Также может быть указано максимальное количество запусков в час, например, 150 запусков в час. Каждый раз, когда вы нажимаете кнопку "вверх" или "вниз", двигатель испытывает бросок тока, генерируя всплеск тепла. Слишком большое количество запусков за короткий период может быть так же вредно, как и длительная работа двигателя.
При выборе будьте безжалостно честны в отношении своего рабочего процесса. Для небольшого цехового подъемника, используемого несколько раз в день для выполнения различных задач, может отлично подойти модель с малым рабочим циклом (например, FEM 1Bm). И наоборот, подъемник на быстроходной сборочной линии, выполняющий сотни одинаковых подъемов за смену, требует гораздо более высокого рабочего цикла (например, FEM 2m или выше). Игнорирование рабочего цикла - это самый быстрый способ сжечь двигатель.
Подберите двигатель в соответствии с рабочим процессом: Прерывистое и непрерывное использование
Различие между периодическим и непрерывным использованием - это практическое применение концепции рабочего цикла. Большинство небольших электрических талей предназначены для периодического использования. Их двигатели компактны и легки, что является преимуществом, но означает, что они имеют меньшую массу для поглощения и рассеивания тепла. Для охлаждения им требуются периоды отдыха.
Подумайте об этих сценариях:
-
Периодическое использование: Механик в гараже поднимает двигатель из автомобиля. Подъем занимает 30 секунд. Затем подъемник держит двигатель в течение 20 минут, пока механик работает, а затем опускает его, что занимает еще 30 секунд. После этого подъемник может простоять час или больше. Для этого случая идеально подходит стандартный подъемник периодического действия. Его двигатель имеет достаточно времени для охлаждения между этими короткими вспышками активности.
-
Постоянное/производственное использование: Оператор на заводе по розливу бутылок использует подъемник, чтобы поднять ящики с пустыми бутылками на конвейер. Цикл подъема, перемещения и опускания занимает 45 секунд и повторяется постоянно, в течение всего дня. Это производственное применение с высоким циклом. Используемый здесь подъемник периодического действия перегрелся бы и вышел из строя за очень короткое время, возможно, в течение нескольких дней или недель. Для такой работы требуется производственный подъемник с более высоким рабочим циклом, более мощным двигателем и, возможно, встроенными вентиляторами охлаждения.
Когда вы видите небольшую электрическую таль по очень привлекательной цене, в подавляющем большинстве случаев это модель периодического действия. В этом нет ничего плохого, это отличные инструменты для своей цели. Опасность заключается в том, чтобы заставить их работать в той роли, для которой они не предназначены. Вы должны проанализировать свой рабочий процесс не только с точки зрения веса, но и с точки зрения времени и частоты. Сколько подъемов в час? Сколько пусков в час? Как долго работает двигатель во время каждого подъема? Ответы на эти вопросы помогут вам выбрать двигатель и рабочий цикл, которые будут надежно служить вам долгие годы, а не тот, который преждевременно выйдет из строя.
Тепловая защита: Непременное средство защиты
Учитывая критический характер управления теплом в двигателе подъемника, надежная система тепловой защиты - это не роскошь, а абсолютная необходимость. Тепловая защита - это средство безопасности, предназначенное для предотвращения достижения двигателем температуры, которая может привести к необратимому повреждению его обмоток.
Наиболее распространенным методом является датчик тепловой перегрузки или выключатель, встроенный непосредственно в обмотку двигателя. Этот датчик постоянно контролирует температуру. Если температура превышает заранее установленный безопасный предел из-за длительного использования, чрезмерных запусков, высокой температуры окружающей среды или засорения вентиляционного отверстия, датчик срабатывает и отключает питание двигателя.
То, что произойдет дальше, очень важно. Подъемник просто перестанет работать. Он не сможет подниматься или опускаться. Это может испугать оператора, но это признак того, что система работает правильно, защищая ваши инвестиции. Подъемник будет оставаться в нерабочем состоянии до тех пор, пока двигатель не остынет до безопасной температуры, после чего термовыключатель автоматически сбросится (в большинстве моделей), и нормальная работа может быть возобновлена.
При оценке подъемника необходимо убедиться в наличии и типе тепловой защиты. В некоторых низкокачественных моделях эта функция может полностью отсутствовать, в результате чего двигатель может перегореть от одного случая неправильного использования. В других может использоваться менее надежный внешний датчик. Золотым стандартом является датчик, интегрированный непосредственно в обмотку, так как он обеспечивает наиболее быстрое и точное считывание температуры, предлагая самый высокий уровень защиты. Подумайте о нем как о встроенном защитнике для двигателя вашего подъемника. Он предотвращает превращение временного недосмотра или неожиданно высокой нагрузки в постоянный и дорогостоящий ремонт. Это функция, которую, как вы надеетесь, вам никогда не придется использовать, но без которой вы никогда не должны обходиться.
Навигация по вариантам подвесов и креплений: Интеграция в ваше пространство
Электрическая таль, какой бы мощной и прочной она ни была, бесполезна, если ее нельзя правильно установить в том месте, где необходимо выполнить работу. Способ подвески - то, как таль крепится к несущей конструкции, - имеет огромное практическое значение. От него зависит мобильность подъемника, его постоянное местоположение и способность органично вписаться в существующий рабочий процесс и инфраструктуру. Выбор не просто технический - он пространственный, вопрос в том, как этот мощный инструмент будет жить и взаимодействовать с вашим рабочим пространством. Варианты варьируются от простых и универсальных до сложных и узкоспециализированных, каждый из которых имеет свой набор преимуществ и требований.
Крюковое крепление: Универсальный стандарт
Наиболее распространенным типом подвеса для электрических талей малого размера является верхний крюк. В корпус тали встроен прочный поворотный крюк, который позволяет легко подвешивать ее к подходящей точке крепления. В качестве такой точки крепления обычно выступает балочный зажим или тележка.
Основным преимуществом крюкового крепления является его универсальность и мобильность. Подъемник с крюковым креплением можно быстро установить, переместить в другое место и снова установить с минимальными усилиями. Это делает его идеальным выбором для строительных площадок, временных рабочих помещений или мастерских, где подъемные работы не ограничиваются одной фиксированной точкой. Электрик может подвесить его к балке, чтобы поднять на место тяжелый трансформатор, а затем снять его и перенести в другую часть здания для выполнения следующей задачи.
Поворотное действие крюка также полезно: оно позволяет вращать корпус подъемника и подвешенный груз, что может помочь в позиционировании. Однако именно эта свобода может быть и недостатком в некоторых ситуациях. Такелаж не закреплен жестко, что может привести к некоторой неустойчивости или "дрейфу" во время установки или когда грузовая цепь натягивается под углом.
При выборе тали с крюковым креплением обратите внимание на сам крюк. Он должен быть изготовлен из кованой легированной стали, прошедшей термическую обработку, и иметь предохранительную защелку. Предохранительная защелка - это подпружиненная скоба, которая закрывает горловину крюка, предотвращая случайное выскальзывание зажима тележки или балки. Это простой, но жизненно важный элемент безопасности, который никогда не следует упускать из виду или отключать.
Крепление на коуш: Специалист по фиксированному положению
В отличие от портативного крепления на крюке, крепление на проушине предназначено для постоянной, фиксированной установки. Вместо верхнего крюка лебедка оснащена массивной монтажной пластиной или "ушком" с отверстиями для болтов. Этот выступ крепится болтами непосредственно к боковым пластинам специально разработанной тележки или к фиксированному монтажному кронштейну.
Основное преимущество крепления на проушинах - жесткость и более низкий профиль. Прикручивая подъемник непосредственно к тележке, вы создаете очень устойчивый, интегрированный блок, который избавлен от лишнего пространства над головой, занимаемого верхним крюком. Это может быть значительным преимуществом в зданиях с низкими потолками, где ценен каждый сантиметр высоты подъема. Сокращение высоты подъема может быть значительным, часто от 15 до 30 сантиметров, что может стать разницей между возможностью поднять объект над препятствием или нет.
Такая жесткость также предотвращает поворот тали, что желательно в тех случаях, когда груз должен быть поднят прямо вверх без какого-либо вращения. Подъемник и тележка перемещаются по балке как единое целое.
Компромиссом за эту стабильность и низкий профиль является полная потеря мобильности. Подъемник на коушах - это полупостоянная установка. Для его перемещения требуется отсоединить его от тележки, а это гораздо более сложный процесс, чем простое отсоединение. Поэтому крепление на ушке - лучший выбор для специализированных рабочих мест, где подъемник всегда будет выполнять одну и ту же функцию в одном и том же месте, например, у конкретного станка или на постоянном сборочном посту, особенно если высота потолка вызывает опасения.
Тележечные системы: Обеспечение горизонтального перемещения
Для многих применений недостаточно только вертикального подъема. Требуется возможность перемещения подвешенного груза в горизонтальном направлении вдоль балки. Для этого используется тележка - колесная тележка, проходящая вдоль нижнего фланца двутавровой балки, или запатентованная гусеничная система. Грузоподъемные механизмы могут крепиться к тележкам либо через верхний крюк (для подъемников с крюком), либо с помощью болтов (для подъемников с проушинами). Существует три основных типа тележек.
Простая или ручная тележка: Это самый простой тип. Оператор перемещает тележку с подвешенным на ней грузом вдоль балки, просто толкая или тяня за сам груз. Этот тип подходит для легких грузов, коротких балок и применений, где точное позиционирование не является первостепенной задачей. Они недороги и не требуют дополнительных элементов управления. Однако толкать тяжелый, раскачивающийся груз может быть сложно и потенциально небезопасно.
Тележка с редуктором: Тележка с зубчатой передачей добавляет еще один уровень механического управления. Она оснащена ручной цепью, которая свисает вниз рядом с пультом управления подъемника'. Когда оператор тянет за эту цепь, она приводит в движение систему шестерен, которые вращают колеса тележки, перемещая ее вдоль балки. Это обеспечивает значительное механическое преимущество, позволяя оператору плавно и точно перемещать тяжелые грузы с минимальными усилиями. Это гораздо более безопасный и контролируемый метод, чем толкать груз вручную. Тележки с редуктором - отличный средний вариант для мастерских и производственных помещений, где груз слишком тяжел для комфортного толкания, но нет необходимости в полностью моторизованной системе.
Моторизованная тележка: Для максимального контроля и производительности подойдет моторизованная тележка. Она оснащена собственным электродвигателем, управляемым дополнительными кнопками на подвесном пульте управления подъемника (или беспроводном пульте). Оператор может перемещать груз в горизонтальном направлении одним нажатием кнопки. Такие тележки являются стандартными для тяжелых условий эксплуатации, длинных балок и ситуаций, когда подъемник установлен слишком высоко для использования ручной цепи с редуктором. Многие тележки с электроприводом также работают в двухскоростном режиме, обеспечивая быструю скорость перемещения и медленную скорость ползания для точного окончательного позиционирования. В паре с двухскоростным подъемником двухскоростная моторизованная тележка обеспечивает полный и точный контроль над грузом во всех трех измерениях.
| Тип тележки | Метод движения | Лучшее для | Ключевое преимущество | Основной недостаток |
|---|---|---|---|---|
| Обычный (ручной) | Толкать/тянуть груз | Небольшие нагрузки, короткий срок службы, редкое использование | Простой, недорогой | Сложная и менее безопасная работа с тяжелыми грузами |
| Редуктор | Потянуть за ручную цепь | Средние и тяжелые нагрузки, требуется точность | Механическое преимущество, контролируемое движение | Медленнее, чем моторизованные, требует ручного труда |
| Моторизованный | Кнопочный электродвигатель | Большие нагрузки, длинные пролеты, частое использование | Легкое, быстрое и точное управление | Самый дорогой, требует питания и более тщательного обслуживания |
Приоритетные функции безопасности: Ваша первая линия обороны
В сфере подъема и перемещения материалов эффективность и производительность всегда должны быть подчинены безопасности. Электрическая таль - это мощный инструмент, концентрирующий огромную силу; когда эта сила неправильно направлена или неконтролируема, последствия могут быть серьезными, приводящими к повреждению оборудования, потере продукции и, что самое серьезное, к травмам людей. Поэтому внимательное изучение встроенных систем безопасности подъемника - это не факультативное занятие для осторожного покупателя, а обязательный шаг для любого ответственного пользователя. Эти системы - не просто аксессуары; это фундаментальные механизмы, которые являются первой и самой важной линией защиты от несчастных случаев и неудач.
Роль концевых выключателей: Предотвращение чрезмерного хода
Одними из самых важных устройств безопасности на электрической тали являются концевые выключатели. Их функция - не допустить слишком большого перемещения крюка в направлении вверх или вниз. Это известно как "избыточный ход".
Верхний концевой выключатель предотвращает столкновение блока крюка с корпусом подъемника. Такое столкновение, известное как "двойная блокировка", чрезвычайно опасно. Оно может привести к перенапряжению подъемной цепи или каната и их обрыву, что приведет к падению груза. Как минимум, это приведет к значительному повреждению подъемника. Верхний концевой выключатель работает, автоматически отключая питание двигателя' в цепи "вверх", когда блок крюка поднимается до заданной точки. Обычно для этого используется рычаг или рука на корпусе тали, которые физически приводятся в действие поднимающимся блоком крюка. В некоторых более продвинутых подъемниках используются поворотные или зубчатые концевые выключатели, которые подсчитывают обороты барабана для еще большей точности.
Нижний концевой выключатель, хотя и не является таким же стандартным, как верхний концевой выключатель на всех моделях, выполняет не менее важную функцию. Он предотвращает полный выход цепи из лебедки. Это очень важно, поскольку якорь цепи внутри тали не рассчитан на полную нагрузку. Минимальное количество витков цепи (обычно два или три) должно оставаться на барабане или в механизме тали, чтобы обеспечить надежное соединение. Нижний концевой выключатель отключает цепь двигателя "вниз", когда крюк достигает самой нижней безопасной точки, обеспечивая поддержание минимального количества витков.
При осмотре потенциального подъемника необходимо не только убедиться в наличии этих переключателей, но и понять их механизм. Прочны ли они и защищены ли от случайных повреждений? Легко ли их регулировать? Надежный набор концевых выключателей - это молчаливый страж, постоянно следящий за границами безопасной эксплуатации.
Функции аварийного останова: Немедленное управление в кризисной ситуации
В любой ситуации, связанной с работающим оборудованием, способность мгновенно остановить движение является первостепенным требованием безопасности. Кнопка аварийного останова, или "E-stop", обеспечивает такую возможность. Как правило, это большая красная кнопка с грибовидной головкой, расположенная на видном месте на пульте управления или дистанционном пульте.
В отличие от обычных кнопок "вверх" или "вниз", которые просто замыкают цепь, кнопка E-stop разработана как безотказное устройство. При нажатии она физически фиксируется в положении "выключено" и разрывает главную цепь питания двигателя и органов управления подъемника', отменяя все остальные функции. Подъемник немедленно остановится и не сможет работать до тех пор, пока кнопка E-stop не будет сброшена вручную, для чего ее обычно нужно повернуть или потянуть, чтобы снять защелку.
Философия дизайна, лежащая в основе E-stop, имеет решающее значение. Он должен легко активироваться в случае паники - достаточно простого сильного удара, но для его сброса должны быть предприняты целенаправленные действия. Это предотвратит случайный перезапуск подъемника в то время, когда аварийная ситуация еще не устранена. Представьте себе сценарий, когда груз начинает зацепляться за препятствие. Оператор может немедленно нажать кнопку E-stop, остановив подъемник и позволив безопасно оценить ситуацию. В противном случае поиск нужной кнопки "стоп" или "вниз" в момент паники может привести к катастрофе. Когда вы держите подъемник' на подвесном пульте управления, ваш большой палец должен быть в состоянии естественно найти и нажать кнопку E-stop, не глядя. Ее наличие и правильное функционирование не подлежат обсуждению.
Защита от перегрузки: Механические и электронные средства защиты
Попытка поднять груз, превышающий номинальную грузоподъемность подъемника, - одна из самых распространенных форм неправильного использования. Надежная система защиты от перегрузки призвана предотвратить это. В современных электрических талях существует два основных типа защиты от перегрузки.
Механическая защита от перегрузки (проскальзывающая муфта): Это очень распространенный и надежный метод. Фрикционная муфта встроена в зубчатую передачу лебедки'. При нормальной работе муфта передает крутящий момент двигателя на подъемный барабан. Однако при возникновении груза, превышающего заданное значение (обычно около 125% от номинальной грузоподъемности), крутящий момент, необходимый для его подъема, приведет к проскальзыванию муфты. Двигатель будет продолжать работать, но сцепление не даст зубчатой передаче провернуться и поднять опасно тяжелый груз. Оператор услышит работу двигателя и проскальзывание сцепления, что является четким звуковым сигналом о том, что груз слишком тяжелый. Проскальзывающая муфта - это надежная механическая система, которая защищает всю конструкцию подъемника - от шестерен до цепи и крюка - от нагрузок, возникающих при перегрузке.
Электронная защита от перегрузки: В более продвинутых подъемниках может использоваться электронная система. Она включает в себя датчик нагрузки или датчик тока, который непрерывно контролирует нагрузку на крюк. Тензодатчик представляет собой датчик, измеряющий прилагаемое усилие, а датчик тока измеряет величину электрического тока, потребляемого двигателем (что прямо пропорционально нагрузке). Если эта система обнаруживает нагрузку, превышающую номинальную, она посылает сигнал в контроллер подъемника', чтобы отключить питание двигателя' в цепи "вверх", предотвращая подъем. Электронные системы могут быть очень точными и оснащены такими функциями, как цифровой дисплей нагрузки.
Обе системы преследуют одну и ту же цель: они не позволяют подъемнику совершить подъем, который может подвергнуть опасности оператора, груз и само оборудование. При покупке подъемника необходимо поинтересоваться, какой тип защиты от перегрузки он включает. Подъемник без какой-либо защиты от перегрузки - это приглашение к серьезному несчастному случаю.
Тормозные системы: Резервирование и надежность
Тормозная система надежно удерживает груз, когда двигатель не работает. Отказ тормоза означает падение груза. По этой причине тормозные системы талей разрабатываются с учетом надежности и избыточности. Наиболее распространенной конфигурацией качественной электрической тали является двойная тормозная система.
Основной тормоз (моторный тормоз): Обычно это электромагнитный, пружинный, дисковый тормоз. Когда двигатель подъемника находится под напряжением (при нажатии кнопки "вверх" или "вниз"), электромагнит отводит тормозные колодки от тормозного диска, позволяя валу двигателя свободно вращаться. В момент прекращения подачи питания на двигатель - при отпускании кнопки, нажатии кнопки E-stop или отключении питания - электромагнит обесточивается, и мощные пружины мгновенно прижимают тормозные колодки к диску, надежно удерживая груз. Такая конструкция является "отказоустойчивой", поскольку для отпускания тормоза требуется питание; при потере питания тормоз автоматически включается.
Вторичный тормоз (механический тормоз нагрузки): Многие высококачественные подъемники оснащены второй, независимой тормозной системой в качестве резервной меры безопасности. Механический грузовой тормоз - это самодействующий тормоз, который использует вес самого груза для предотвращения его падения. Распространенной конструкцией является тормоз типа "Weston", в котором используется храповой и щеколдный механизм с фрикционными дисками. Он позволяет свободно поднимать груз, но автоматически срабатывает и удерживает его, если основной моторный тормоз выходит из строя или если зубчатая передача срезается. Он обеспечивает критически важный уровень резервной защиты.
Оценивая подъемник, поинтересуйтесь его тормозной системой. Это одинарная или двойная система? Является ли первичный тормоз отказоустойчивым (пружинный, с силовым размыканием)? Включает ли он вторичный механический грузовой тормоз? Качество и конструкция тормозной системы являются прямым отражением приверженности производителя к безопасности. Изучите технические характеристики ассортимент электрических цепных талей может дать представление о технологиях торможения, используемых в современных конструкциях.
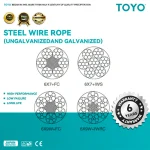
Исследование средства подъема: Цепь против каната для небольших подъемников
Элемент, который физически соединяет таль с грузом - грузоподъемное средство - является компонентом огромной важности. В категории малых электрических талей споры ведутся в основном о двух вариантах: грузовой цепи и канате. Несмотря на то, что оба варианта широко используются в мире грузоподъемных механизмов, для талей малой грузоподъемности, применяемых в мастерских, на сборочных линиях и для общего технического обслуживания, грузовая цепь стала доминирующим и зачастую лучшим выбором по целому ряду практических причин. Понимание характеристик, преимуществ и требований по уходу за каждым из них позволяет сделать выбор более разборчивым.
Цепь: Долговечность и гибкость
Грузовая цепь является фаворитом среди небольших электрических и ручных талей, и на то есть веские причины. Сама природа ее конструкции обеспечивает уникальное сочетание прочности, долговечности и гибкости.
Долговечность и износостойкость: Высококачественная грузовая цепь - это не обычная цепь. Она изготавливается из специальных стальных сплавов, проходит точную формовку, сварку, а затем термообработку для достижения определенного баланса твердости, прочности и пластичности. Этот процесс, часто включающий закалку, создает прочную внешнюю поверхность, которая обладает высокой устойчивостью к истиранию и износу, сохраняя при этом более вязкую сердцевину, способную выдерживать ударные нагрузки без разрушения. Звено цепи может выдерживать трение о другие звенья или случайный контакт с корпусом подъемника или другими конструкциями гораздо лучше, чем отдельные проволоки каната.
Гибкость и устойчивость к перегибам: Цепь по своей природе более гибкая, чем канат, и не склонна к перегибам. Ее можно пропустить через карманное колесо относительно небольшого диаметра (специальный механизм внутри тали, который зацепляет звенья цепи) без повреждений. Канат, напротив, требует гораздо большего диаметра барабана, чтобы избежать усталости и повреждений от изгибов. Это позволяет цепным талям быть значительно более компактными и легкими, чем канатные тали той же грузоподъемности, что является важным преимуществом для небольших переносных устройств. Цепь также может выдерживать небольшие скручивания и не самые идеальные вертикальные подъемы, не подвергаясь структурным повреждениям, которые могут разрушить канат.
Легкость осмотра: Осмотр грузовой цепи - это относительно простой визуальный и тактильный процесс. Инспектор может проверить наличие зазубрин, выемок, растяжения (путем измерения длины цепи) и износа поверхностей звеньев. Хотя для этого требуется опыт, признаки повреждения обычно видны на поверхности. Осмотр каната более сложен, поскольку внутренние разрывы проволоки и коррозия могут происходить так, что их сразу не видно на внешней стороне.
Настоящий вертикальный подъем: Цепная таль обеспечивает истинно вертикальный подъем, то есть крюк не перемещается горизонтально при подъеме или опускании. В типичной канатной тали канат наматывается на желобчатый барабан. По мере наматывания он перемещается от одного конца барабана к другому, вызывая небольшое смещение крюка вбок. Хотя это часто бывает незначительным, для задач точного размещения идеальная вертикальная траектория цепной тали является явным преимуществом.
В каких случаях можно использовать проволочный канат
Несмотря на доминирование цепи на рынке малых талей, есть области применения, где канатные тали являются предпочтительным решением. Как правило, они применяются в системах с большей грузоподъемностью или высокой скоростью.
Более высокие скорости и более длительные подъемы: Канат, как правило, может работать на гораздо более высоких скоростях, чем цепь. Плавный, непрерывный характер наматывания каната на барабан обеспечивает более быструю и тихую работу по сравнению с движением отдельных звеньев цепи, входящих в зацепление с карманным колесом. Для приложений, требующих очень большой высоты подъема - например, в театрах, лифтах или глубоких шахтах, - канат является единственным практичным вариантом, поскольку хранение сотен метров цепи становится громоздким.
Особые условия окружающей среды: В некоторых агрессивных средах канат из оцинкованной или нержавеющей стали может иметь лучшие характеристики, чем стандартная грузовая цепь из легированной стали.
Для подавляющего большинства пользователей, которым нужна небольшая электрическая таль (обычно в диапазоне от 125 кг до 5 тонн), компактность, долговечность и экономическая эффективность цепной тали делают ее более логичным и распространенным выбором. Канатные тали начинают демонстрировать свои преимущества в более крупных, быстрых и специализированных промышленных кранах.
Класс и материал цепи: На что обратить внимание
Не все цепи одинаковы. При выборе электрической цепной тали необходимо проверить класс грузовой цепи. Грузовая цепь классифицируется по пределу прочности на разрыв. Для подвесного подъема допустимо использовать только высококачественные цепи из легированной стали, прошедшие термическую обработку.
Наиболее распространенной маркой для современных высококачественных подъемников является Оценка 80 (или T). Это уже давно является промышленным стандартом, обеспечивая отличные прочностные и износостойкие характеристики. Все чаще производители переходят на еще более высокие сорта, такие как Оценка 100 (или V). Цепь класса 100 имеет примерно на 25% более высокое соотношение прочности и веса, чем класс 80. Это означает, что производитель может использовать меньшую, более легкую цепь для достижения той же грузоподъемности или обеспечить более высокую грузоподъемность при том же размере цепи.
Также важно покрытие цепи. Черное или чернооксидное покрытие обеспечивает базовый уровень коррозионной стойкости. В более сложных условиях электрооцинкованная цепь или цепь со специальным покрытием обеспечивает превосходную защиту от ржавчины. Для пищевой или фармацевтической промышленности часто требуется грузовая цепь из нержавеющей стали, чтобы соответствовать гигиеническим стандартам.
При покупке подъемника цепь является важнейшим элементом безопасности. Вы должны ожидать, что на ней будет регулярно указываться ее класс (например, "T8" или "T10"). Вы также должны получить документацию, подтверждающую свойства материала и соответствие международным стандартам, таким как EN 818-7. Никогда не используйте тали с немаркированной или низкосортной цепью (например, транспортной) для подъема на высоту. От качества этой цепи в буквальном смысле зависит целостность всей вашей работы.
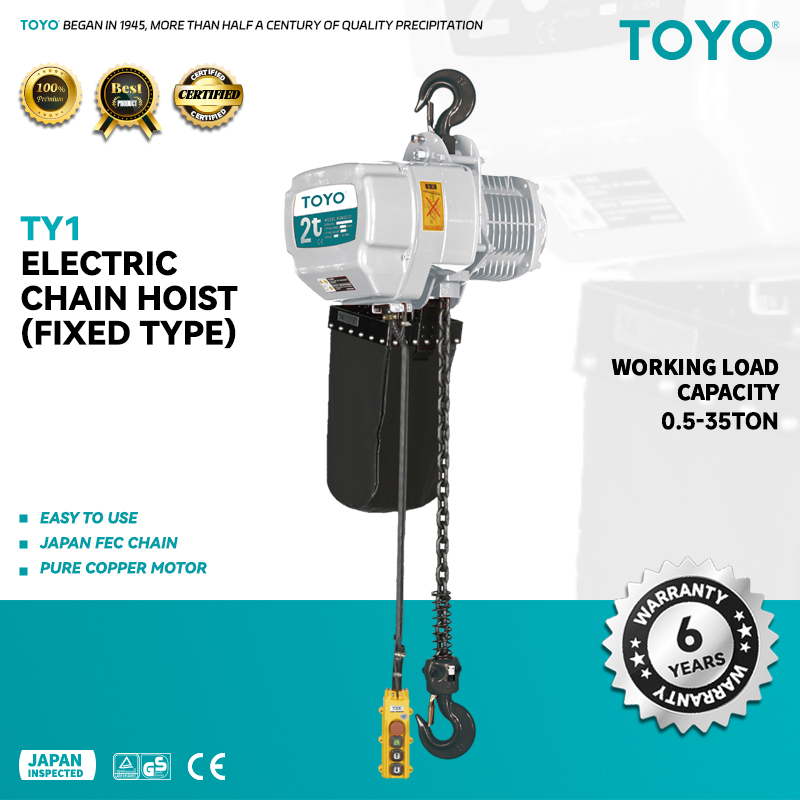
Системы управления и электропитания: Пользовательский интерфейс
Система управления электрической тали - это непосредственный интерфейс между оператором и машиной. Она является каналом, через который человеческие намерения преобразуются в мощные и точные движения. Дизайн, эргономика и надежность этой системы оказывают непосредственное влияние на безопасность, эффективность и утомляемость пользователя. В сочетании с этим необходимо уделить особое внимание источнику питания - жизненно важной составляющей подъемника. Соответствие электрических требований подъемника' инфраструктуре вашего объекта' является необходимым условием для успешной установки. Эти элементы управления и питания не являются второстепенными; они неотъемлемы от работы подъемника и должны быть тщательно проанализированы.
Подвесные пульты управления: Проводное соединение
Наиболее распространенным способом управления электрической талью является кнопочное подвесное управление. Это ручной блок управления, который подключается к тали через гибкий многожильный электрический кабель.
Эргономика и долговечность: Хорошо спроектированный кулон предназначен для промышленного использования. Он должен быть изготовлен из ударопрочного и долговечного полимера, иметь эргономичную форму, чтобы удобно лежать в руке, и обеспечивать защиту от пыли и воды, о чем свидетельствует степень защиты IP (например, IP65). Сами кнопки должны быть достаточно крупными, чтобы ими можно было пользоваться руками в перчатках, и обеспечивать четкую тактильную отдачу. Для двухскоростных подъемников они обычно двухступенчатые: частичное нажатие для медленной скорости, полное нажатие для быстрой скорости.
Особенности безопасности: Подвесной кабель должен иметь собственную встроенную систему разгрузки от натяжения. Это стальной трос, проходящий вдоль электрического кабеля и закрепленный как на подъемнике, так и на подвеске. Его задача - выдержать вес и нагрузку подвески, чтобы нежные электрические провода внутри не были растянуты или повреждены. Эта критическая особенность часто отсутствует на подъемниках низкого качества. На подвеске также должна располагаться большая красная кнопка аварийной остановки, о которой говорилось ранее.
Главное преимущество проводного кулона - его надежность. Нет ни батарей, которые могли бы сесть, ни сигналов, на которые можно было бы повлиять. Связь прямая и надежная. Основным недостатком является сам кабель. Он может запутаться, ограничить движения оператора и вынудить его идти в непосредственной близости от груза, что в некоторых ситуациях может представлять угрозу безопасности.
Беспроводные пульты дистанционного управления: Свобода и безопасность
С развитием технологий беспроводные пульты дистанционного управления становятся все более популярным и доступным вариантом для электрических подъемников. Беспроводная система состоит из ручного передатчика и приемника, установленного на подъемнике.
Повышенная безопасность и мобильность: Самое главное преимущество беспроводного пульта заключается в том, что он отделяет оператора от подъемника и груза. Оператор может стоять на безопасном расстоянии, вдали от зоны подъема, с гораздо лучшей точки обзора, чтобы наблюдать за всей операцией. Это особенно важно при подъеме больших или неудобных грузов, которые могут загораживать оператору обзор, или при работе в опасной зоне. Это позволяет оператору выбрать наиболее безопасное положение, из которого он может управлять подъемником.
Повышенная производительность: Беспроводное управление также может повысить эффективность работы. Оператор может управлять подъемником, находясь в другом конце цеха, без необходимости подходить к подвеске. Если в работе участвуют два человека, один может управлять грузом, а другой - управлять подъемником из оптимального положения.
Соображения и средства защиты от сбоев: Современные промышленные системы радиоуправления отличаются высокой надежностью. Они работают в определенных частотных диапазонах и используют уникальные идентификационные коды для предотвращения помех от других устройств. В них реализовано множество функций безопасности. Например, если передатчик теряет связь с приемником (из-за выхода из зоны действия или разряда батареи), система работает в режиме отказоустойчивости, немедленно останавливая движение подъемника. В них также предусмотрена кнопка E-stop, как и в подвесных системах. Основными соображениями являются необходимость управления и зарядки батарей для передатчика и несколько более высокая первоначальная стоимость по сравнению со стандартной подвесной системой. Однако для многих пользователей значительное повышение безопасности и гибкости значительно перевешивает эти факторы.
Источники питания: Напряжение, фаза и портативность
Электрическая таль нуждается в электричестве, но убедиться в том, что у вас есть подходящий тип электричества, - это важный шаг, который необходимо сделать до покупки. Несоответствие может привести к дорогостоящему переоборудованию или необходимости возврата оборудования.
Напряжение и фаза: Наиболее важными характеристиками являются напряжение и фаза.
- Однофазное питание: Это стандартное питание, которое используется в домах и небольших мастерских (например, 110-120 В или 220-240 В). Многие из самых маленьких электрических талей рассчитаны на однофазное питание, что делает их очень удобными, поскольку их часто можно подключить к стандартной мощной розетке.
- Трехфазное питание: Это стандарт для промышленных и коммерческих объектов (например, 220 В, 380 В, 400 В, 415 В, 480 В). Трехфазные двигатели обычно более эффективны, мощнее и имеют более длительный срок службы, чем однофазные. Почти все подъемники промышленного класса, даже небольшой грузоподъемности, требуют трехфазного питания.
Очень важно, чтобы вы подтвердили наличие электроэнергии в месте установки. Если вы закажете трехфазный подъемник на 380 В для мастерской, где есть только однофазное питание 240 В, то получите подъемник, который просто не будет работать. Многие производители предлагают свои подъемники с различными напряжениями и фазами, чтобы соответствовать различным мировым рынкам, от Южной Америки до Южной Африки. При заказе необходимо указать правильную конфигурацию.
Кабель питания и подключение: Для подъемника потребуется кабель питания. Для небольших однофазных подъемников это может быть простой шнур с вилкой. Для больших трехфазных подъемников это, как правило, гибкий кабель питания, который должен быть подключен к разъединителю или силовому шинопроводу квалифицированным электриком. Длина этого кабеля, а также кабеля управления подвеской должна соответствовать высоте подъема и рабочей зоне.
Вдумчиво подобрав систему управления, которая лучше всего подходит для вашего рабочего процесса, и тщательно проверив доступное электропитание, вы гарантируете, что ваш новый подъемник будет не только выполнять свои функции, но и делать это безопасно, эффективно и идеально интегрироваться в вашу рабочую среду.
Оценка экологических и прикладных потребностей
Подъемник не работает в вакууме. Он существует в физической среде, и характеристики этой среды могут оказывать огромное влияние на его производительность, долговечность и безопасность. Пыль, влага, экстремальные температуры, специфические требования отрасли, например, пищевой или химической, - все это накладывает требования, выходящие за рамки стандартных спецификаций. По-настоящему продуманный процесс выбора включает в себя тщательную оценку предполагаемого рабочего места и выбор подъемника с соответствующими средствами защиты и функциями для работы в нем. Это сродни выбору одежды в соответствии с погодными условиями: стандартный подъемник в суровых условиях так же плохо подготовлен, как человек в футболке во время снежной бури.
Номинальные значения IP: Защита от пыли и воды
Одной из наиболее полезных характеристик для оценки устойчивости подъемника к воздействию окружающей среды является его рейтинг защиты от проникновения (IP). Определенный международным стандартом IEC 60529, рейтинг IP представляет собой двузначный код, который классифицирует степень защиты, обеспечиваемую электрическими корпусами подъемника - а именно, корпусом двигателя и блоком управления.
-
Первая цифра (Защита твердых тел): Это число, от 0 до 6, указывает на уровень защиты от проникновения твердых инородных предметов, от крупных частей тела до микроскопической пыли. Оценка '5' означает, что корпус "защищен от пыли", когда пыль может проникать внутрь, но не в таком количестве, чтобы мешать работе. Рейтинг '6' означает, что корпус является "пыленепроницаемым", то есть пыль вообще не проникает внутрь.
-
Вторая цифра (защита жидкостей): Это число от 0 до 9 указывает на уровень защиты от проникновения воды. Значение '4' означает защиту от брызг воды с любого направления. Рейтинг '5' защищает от струй воды. Более высокие рейтинги (7 и 8) означают защиту от временного или длительного погружения в воду.
Обычный качественный подъемник для помещений может иметь класс защиты IP54. Это означает, что он защищен от пыли и брызг воды. Для применения на открытом воздухе или на объектах, где оборудование часто моют, потребуется более высокий класс, например IP65 (пыленепроницаемость и защита от водяных струй). Если посмотреть на технические характеристики высококачественные электрические тали малых моделейЧасто можно найти четкое указание степени защиты IP. Игнорирование этого класса может привести к короткому замыканию, коррозии и преждевременному выходу из строя электрических компонентов при использовании подъемника в условиях, для которых он не был предназначен.
Специальные условия: Подъемники для пищевых продуктов, взрывозащищенные подъемники и подъемники для чистых помещений
Некоторые области применения предъявляют требования, выходящие далеко за рамки стандартных значений IP. В таких специализированных средах требуются подъемники с очень специфическими конструктивными особенностями и материалами.
Подъемные механизмы пищевого класса: В промышленности по переработке пищевых продуктов и напитков гигиена имеет первостепенное значение. Стандартный подъемник с окрашенными поверхностями и смазкой на основе масла неприемлем. Подъемник пищевого класса должен обладать такими характеристиками, как:
- Корпус, крюк и цепь из нержавеющей стали или со специальным антикоррозийным никелированным покрытием, предотвращающим появление ржавчины и допускающим агрессивное мытье.
- Пищевая смазка в редукторе, которая нетоксична при случайном контакте с пищевыми продуктами.
- Герметичные корпуса и гладкие, без щелей конструкции предотвращают скопление бактерий.
Взрывозащищенные подъемники (ATEX/IECEx): В среде, где присутствуют горючие газы, пары или горючая пыль - например, на химических заводах, нефтеперерабатывающих предприятиях или зерновых фабриках, - стандартная электрическая таль является источником воспламенения. При нормальной работе ее двигателя, тормозов и переключателей возникают небольшие искры, которые могут спровоцировать катастрофический взрыв. Взрывозащищенная лебедка спроектирована таким образом, чтобы предотвратить это. Она включает в себя:
- Полностью герметичные корпуса электродвигателей и электрооборудования, способные удержать внутренний взрыв, не позволяя ему распространиться во внешнюю атмосферу.
- Искростойкие компоненты, такие как крюки с бронзовым покрытием, бронзовые колеса тележки и цепь из нержавеющей стали.
- Специализированная проводка и кабелепровод для предотвращения электрической дуги. Эти подъемники сертифицированы по специальным стандартам, таким как ATEX (для Европы) или IECEx (международный), для использования в определенных опасных зонах.
Подъемники для чистых помещений: В таких условиях, как производство полупроводников или фармацевтические лаборатории, важно не то, что попадает в подъемник, а то, что выходит из него. Подъемник для чистых помещений спроектирован таким образом, чтобы генерировать минимальное количество загрязняющих частиц. Это может включать в себя:
- Специализированные ремни вместо цепей для устранения частиц износа.
- Герметичные редукторы с низкогазированными смазочными материалами.
- Поверхности из нержавеющей стали и нелиняющие детали.
Эти специализированные подъемники требуют значительных инвестиций, но для таких критически важных применений они являются единственным безопасным и соответствующим требованиям вариантом.
Сравнение с альтернативами: Ручные и рычажные тали
Наконец, комплексная оценка включает в себя рассмотрение вопроса о том, действительно ли электрическая таль является подходящим инструментом для данной работы, или ручная альтернатива может быть достаточной или даже предпочтительной.
Ручные цепные тали: Ручная цепная таль, часто называемая цепным блоком или цепной талью, использует ручную цепь и систему редукторов для подъема груза. Оператор тянет за ручную цепь, чтобы поднять груз, а груз удерживается механическим тормозом. Их преимуществами являются:
- Не требует питания: Их можно использовать где угодно, что идеально подходит для удаленных мест или рабочих площадок без электричества.
- Стоимость: Они значительно дешевле электрических талей.
- Портативность: Как правило, они легче и компактнее.
Очевидный недостаток - скорость и усилия. Подъем тяжелого груза происходит медленно и требует больших физических усилий. Они лучше всего подходят для работ по техническому обслуживанию, нерегулярных подъемов и ситуаций, когда точность важнее скорости.
Рычажные подъемники: Рычажная таль, или таль, - это еще один тип ручной тали. Вместо ручной цепи она приводится в действие с помощью рычага, поворачиваемого вперед-назад. Они очень компактны и могут использоваться в любой ориентации - вертикальной, горизонтальной или наклонной, что делает их чрезвычайно универсальными для вытягивания, натяжения и фиксации грузов, а также для подъема. Это инструмент, который выбирают такелажники и работники коммунальных служб для коротких и мощных рывков.
Решение о выборе электрической тали по сравнению с ручной сводится к частоте и нагрузке. Если вы поднимаете грузы несколько раз в час или если грузы достаточно тяжелые, чтобы ручное управление вызывало усталость и напряжение, инвестиции в электрическую таль быстро окупятся за счет повышения производительности и улучшения эргономики, снижая риск травм опорно-двигательного аппарата для ваших сотрудников.
Широкая подъемная экосистема: Стропы, зажимы и опорные конструкции
Электрическая таль, при всей ее мощности и совершенстве, является лишь одним из компонентов комплексной системы подъема. Ее функция заключается в обеспечении движущей силы, но она не может действовать в одиночку. Безопасное и эффективное перемещение груза в равной степени зависит от целостности компонентов, которые находятся между крюком тали и самим грузом, а также от прочности конструкции, к которой подвешена таль. Сосредоточиться только на подъемном устройстве - значит увидеть лишь одну часть глубоко взаимосвязанной системы. Ответственный подход к подъему груза требует целостного взгляда, охватывающего стропы, которые держат груз, зажимы, которые его захватывают, и балки, которые поддерживают всю операцию.
Высокопрочные стропы: Критическое звено
Когда крюк для подъема готов, встает вопрос: как прикрепить его к грузу? В этом и заключается роль грузоподъемного стропа. Использование некачественных или поврежденных строп - одна из наиболее частых причин несчастных случаев, связанных с падением груза. Существует целый ряд высокопрочных строп, каждый из которых обладает свойствами, подходящими для различных типов грузов и условий эксплуатации.
-
Веббинговые стропы: Изготовленные из высокопрочного полиэстера или нейлона, они легкие, гибкие и мягкие, что делает их идеальными для подъема грузов с чувствительными или легко повреждаемыми поверхностями. Они могут быть различной ширины и конфигурации (например, бесконечные петли или с проушинами на каждом конце). Их основная уязвимость - порезы и истирание, поэтому при использовании на грузах с острыми краями они должны быть защищены накладками.
-
Круглые стропы: Они похожи на стропы из тесьмы, но состоят из непрерывной петли из полиэфирной нити высокой прочности, заключенной в прочную внешнюю оболочку. Они обладают очень высоким соотношением прочности и веса и чрезвычайно гибкие, хорошо приспосабливаясь к форме нестандартных грузов.
-
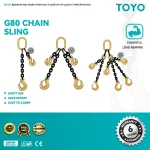
Цепные стропы: Для прочного, тяжелого подъема грузов в суровых условиях нет ничего лучше цепного стропа. Изготовленные из той же легированной стали Grade 80 или Grade 100, что и грузоподъемные цепи, они обладают высокой устойчивостью к истиранию, высоким температурам и химическому воздействию. Они могут иметь одну, две, три или четыре опоры для обеспечения стабильного, сбалансированного подъема самых разных грузов.
-
Канатные стропы: Они обеспечивают хороший баланс между прочностью, износостойкостью и стоимостью. Они менее гибкие, чем синтетические стропы, но более гибкие, чем цепные стропы. Они часто используются для такелажа общего назначения и в строительстве.
Выбор типа стропа и его грузоподъемности должен осуществляться с той же тщательностью, что и выбор подъемника. Предел рабочей нагрузки (ПРН) стропа должен быть достаточным для груза, и этот предел меняется в зависимости от угла подъема ("угол наклона стропа"). Когда угол между стропами и горизонталью уменьшается, напряжение в каждой стропе резко возрастает. Грамотный такелажник понимает эти принципы и подбирает стропы соответствующим образом.
Специализированные подъемные зажимы для различных материалов
Во многих случаях обматывать стропы вокруг груза нецелесообразно и небезопасно. Для работы со специфическими материалами, такими как стальные листы, балки или барабаны, используются специализированные подъемные зажимы. Эти устройства крепятся непосредственно к грузу и обеспечивают надежную точку подъема.
-
Зажимы для пластин: Они необходимы для перемещения стальных листов в вертикальном или горизонтальном положении. В них используется челюстной механизм, усилие захвата которого увеличивается пропорционально весу груза. Когда начинается подъем, зажим вгрызается в плиту, создавая надежную фиксацию, которая не ослабевает до тех пор, пока существует напряжение на подъемнике.
-
Зажимы для балок: Они используются для подъема и транспортировки двутавровых балок и других стальных конструкций. Они надежно фиксируются на фланце балки. Некоторые балочные зажимы также предназначены для использования в качестве полупостоянной, подвижной точки опоры для подъемника на подвесной балке.
-
Зажимы для барабанов: Для подъема 210-литровых (55-галлонных) стальных или пластиковых бочек наиболее безопасным и эффективным методом является использование специализированного зажима для бочек, который захватывает обод бочки.
Использование правильных подъемных зажимов не только делает подъем более безопасным, но и значительно ускоряет процесс перемещения материалов. Как и любое другое грузоподъемное оборудование, они должны регулярно проверяться на предмет износа и повреждений, особенно на захватных губках.
Обеспечение структурной целостности вашей балки или портала
Вся система подъема - лебедка, тележка, зажимы, стропы и сам груз - в конечном итоге опирается на подвесную конструкцию. Как правило, это двутавровая балка, которая может быть частью каркаса здания' или специально построенный отдельно стоящий козловой кран. Целостность этой опорной конструкции имеет огромное значение.
Перед установкой любого подъемника квалифицированный инженер-строитель должен убедиться, что балка или опорная конструкция способна выдержать не только номинальную грузоподъемность подъемника, но и вес самого подъемника и тележки, плюс значительный коэффициент безопасности для учета динамических нагрузок. Подъемник весом 1 тонна может оказывать на опорную балку силу, значительно превышающую 1 тонну, во время ускорения, замедления и при любом колебании груза.
Инженер проверит размер, материал, пролет и способ крепления балки, чтобы убедиться, что она не будет чрезмерно прогибаться, прогибаться или выходить из строя под максимально возможной нагрузкой. Прикрепление подъемника к балке, которая не была одобрена для этой цели, является безрассудным поступком, подвергающим риску весь объект и его персонал. Для новых объектов это может быть связано со спецификацией и установкой новой, специальной двутавровой балки. Для существующих конструкций требуется тщательный анализ и расчет нагрузки. Здесь не место догадкам и предположениям. Сертификация несущей конструкции профессионалом является основополагающим требованием для любого безопасного монтажа подвесного оборудования.
Монтаж и ввод в эксплуатацию: Методический подход
Прибытие новой электрической тали малого размера - это начало, а не конец процесса. Переход от инструмента в ящике к полностью функциональному и безопасному компоненту вашего рабочего процесса достигается с помощью методичного процесса установки и ввода в эксплуатацию. Этот этап так же важен для безопасности и производительности, как и первоначальный выбор оборудования. Поспешная или неправильная установка может подорвать те самые функции безопасности, которые вы так тщательно выбирали, создать опасность для работы и лишить производителя гарантии. Процесс должен выполняться компетентным персоналом, понимающим как механические, так и электрические аспекты задачи, с соблюдением четкой и логичной последовательности шагов.
Контрольный список перед установкой
Прежде чем взять в руки инструменты, необходимо провести окончательную проверку и подготовку. Это время, чтобы предотвратить проблемы до их возникновения.
- Осмотрите оборудование: Осторожно распакуйте подъемник и все его компоненты. Визуально осмотрите все на предмет повреждений, которые могли возникнуть во время транспортировки. Убедитесь в наличии всех деталей, перечисленных в упаковочном листе: подъемника, контейнера для цепи, подвесного пульта управления, всех компонентов тележки и руководства пользователя.
- Проверьте структуру: Убедитесь, что балка или козловой кран, на котором будет установлен подъемник, одобрен для данной нагрузки, как обсуждалось ранее. Убедитесь, что ширина и форма фланца балки совместимы с используемой тележкой. Колеса тележки'предназначены для определенного диапазона ширины фланцев.
- Просмотрите руководство: Инструкция производителя'- самый важный документ при установке. Внимательно прочитайте его. В нем содержатся конкретные инструкции, спецификации крутящего момента для болтов, электрические схемы и предупреждения по безопасности, характерные только для вашей модели. Не думайте, что вы знаете, как установить устройство, основываясь на прошлом опыте работы с другими подъемниками.
- Проверьте источник питания: С помощью мультиметра убедитесь, что напряжение и фаза электросети в месте установки соответствуют паспортной табличке подъемника'. Убедитесь в наличии блокируемого разъединителя для безопасного обесточивания цепи во время монтажа.
- Соберите инструменты и персонал: Соберите все необходимые инструменты, такие как гаечные ключи, динамометрические ключи, подъемное оборудование для подъема тали на место (например, небольшую ручную таль или ножничный подъемник), а также средства индивидуальной защиты (СИЗ) - каски, защитные очки и перчатки. Убедитесь, что при установке присутствуют как минимум два человека; таль, даже небольшая, неудобна и тяжела для безопасной работы одного человека на высоте.
Процесс механической установки
После завершения подготовки можно приступать к механическому монтажу.
- Установка тележки: Если вы используете тележку, ее обычно сначала устанавливают на балку. Для тележки с обычным или зубчатым приводом это часто включает в себя регулировку расстояния между боковыми пластинами и колесами, чтобы они соответствовали фланцу балки, а затем закрепление распорных гаек. Тележка с электроприводом устанавливается аналогичным образом.
- Монтаж подъемника: Следующий шаг - подъем подъемника на место.
- Для таль с крюковым креплениемПросто аккуратно поднимите его и надежно закрепите верхний крюк на подвесной штанге тележки'. Убедитесь, что предохранительная защелка крюка правильно зафиксирована.
- Для лебедка с креплением на коушНо этот процесс более сложный. Необходимо поднять подъемник и точно совместить его с монтажными отверстиями на тележке. Затем вставляются высокопрочные болты и затягиваются с указанным производителем моментом. Это очень важный этап, поскольку недостаточно затянутые болты могут ослабнуть, а неправильно затянутые - выйти из строя.
- Прикрепление контейнера для цепи: Контейнер для цепи, обычно представляющий собой холщовый мешок или пластиковую коробку, крепится к корпусу тали. В этом контейнере аккуратно хранится свободный конец грузовой цепи, не позволяя ему свисать вниз, где он может стать причиной зацепа.
Электрическое подключение и тестирование
После механической фиксации подъемника электрические соединения может выполнить квалифицированный электрик.
- Безопасность превыше всего: Источник питания должен быть отключен и заблокирован на разъединителе в соответствии со стандартными процедурами блокировки/тагаута. Это предотвратит возможность случайного включения цепи под напряжение, пока кто-то работает с ней.
- Подключение питания: Главный кабель питания прокладывается к подъемнику и подключается к клеммам на электрической панели подъемника' в соответствии с электрической схемой, приведенной в руководстве.
- Проверка фаз (для трехфазных подъемников): Это очень важный шаг. Если фазы трехфазного двигателя подключены неправильно, двигатель будет работать в обратном направлении. Это означает, что когда оператор нажимает кнопку "вверх", подъемник опускается, и наоборот. Это крайне опасно. После первоначального подключения необходимо кратковременно включить питание и кратковременно нажать кнопку "вверх". Если крюк движется вниз, необходимо немедленно снова отключить питание и поменять местами два из трех силовых проводов. Эту процедуру, известную как "обкатка" двигателя, необходимо выполнить до подачи нагрузки.
- Тестирование средств контроля: После того как фазировка будет установлена правильно, проверьте все функции подвески или пульта дистанционного управления без нагрузки. Проверьте движение вверх, вниз, перемещение тележки влево и вправо, а также быструю и медленную скорости, если это применимо. Самое главное, проверьте кнопку аварийного останова, чтобы убедиться, что она немедленно останавливает все функции.
Нагрузочное тестирование и сертификация
Заключительным этапом ввода в эксплуатацию является проверка работоспособности и безопасности подъемника в реальных условиях.
- Первоначальный тест нагрузки: Необходимо приложить нагрузку, эквивалентную номинальной грузоподъемности подъемника. Многие нормативные документы, например, ASME, рекомендуют испытательную нагрузку до 125% от номинальной мощности для нового или отремонтированного подъемника (ASME, 2021). Это должен делать только компетентный специалист в контролируемой зоне.
- Эксплуатационные испытания: Тестовый груз следует поднять на небольшое расстояние от земли и подтвердить способность тормоза удерживать груз. Затем подъемник следует проработать в полном диапазоне движений - подъем, опускание и перемещение - чтобы убедиться в плавности работы и надлежащем функционировании всех систем.
- Тест концевого выключателя: Необходимо проверить работу верхнего и нижнего концевых выключателей. Медленно проведите пустой крюк вверх, пока верхний концевой выключатель не сработает и не остановит движение. Затем сделайте то же самое для нижнего концевого выключателя.
- Документация: Запись об успешной установке и нагрузочном испытании должна быть составлена и зарегистрирована. Этот документ, часто называемый сертификатом о вводе в эксплуатацию, служит основой для определения срока службы подъемника и будущих записей о проверках.
Только после завершения этого тщательного процесса подъемник может считаться готовым к эксплуатации и передаваться обученным операторам.
Режимы технического обслуживания и осмотра: Максимальный срок службы и безопасность
Покупка и установка электрической тали - значимые события, но на этом забота о безопасности и надежности не заканчивается. Подъемник - это динамичный механизм, подверженный износу, нагрузкам и негативному воздействию окружающей среды. Дисциплинированная и последовательная программа технического обслуживания и проверки - это не просто рекомендация, это юридическое и этическое обязательство. Такой режим - единственный способ гарантировать, что подъемник будет продолжать работать так, как задумано, выявлять и устранять потенциальные неисправности до их возникновения, а также максимизировать отдачу от ваших инвестиций в течение длительного срока службы. Эту ответственность разделяют между собой ежедневный пользователь и обученный обслуживающий персонал.
Ежедневные проверки перед использованием: Ответственность пользователя'
Перед первым подъемом каждой смены оператор подъемника должен провести быструю, но очень важную серию проверок перед использованием. Это передовой рубеж безопасности подъемника, призванный выявить очевидные проблемы, которые могли возникнуть с момента последнего использования. Эта проверка не требует инструментов и занимает всего несколько минут, но она бесценна. Оператор должен быть обучен следовать простому контрольному списку, который включает в себя:
- Визуальная проверка подъемника: Ищите любые очевидные признаки повреждений, например, треснувшие или сломанные корпуса, вытекающее масло или ослабленные болты.
- Проверьте крючок и защелку: Осмотрите крюк на предмет наличия признаков скручивания, растяжения (расширенное отверстие горловины) или трещин. Вручную нажмите на предохранительную защелку, чтобы убедиться, что она свободно перемещается и надежно фиксируется на месте.
- Осмотрите грузовую цепь: Визуально проверьте открытую часть грузовой цепи на наличие зазубрин, выемок, брызг сварки, следов растяжения или коррозии. Проверьте, не перекручена ли цепь.
- Проверьте органы управления: Проверьте работу подвески или пульта. Все ли кнопки свободно перемещаются и возвращаются в нейтральное положение? Не мешает ли кнопка аварийной остановки?
- Функциональный тест (без нагрузки): Прокатите подъемник вверх и вниз на небольшое расстояние без груза. Прислушайтесь, нет ли необычных звуков, таких как скрежет или визг. Убедитесь, что подъемник плавно запускается и останавливается. Проверьте верхний концевой выключатель, медленно поднимая крюк до упора.
- Проверьте рабочую зону: Убедитесь, что путь подъема свободен от препятствий и персонала.
Если любая из этих проверок выявит проблему, оператор обязан немедленно вывести подъемник из эксплуатации и сообщить об этом руководителю. Для четкой маркировки неисправного оборудования следует использовать простую систему бирок ("Не эксплуатировать").
Периодические проверки: В соответствии со стандартами производителя и нормативными документами
Если ежедневные проверки позволяют выявить очевидные неисправности, то периодические осмотры - это гораздо более тщательное и детальное обследование, проводимое компетентным, обученным специалистом через регулярные промежутки времени. Регулятивные органы, такие как OSHA в США и Управление по охране труда и технике безопасности (HSE) в Великобритании, предписывают проведение таких проверок, а подробный график и процедура указаны в руководстве производителя.
Частота этих проверок зависит от классификации подъемника'по условиям эксплуатации, окружающей среды и рабочего цикла.
- Нормальное обслуживание: Ежегодная проверка.
- Тяжелая служба: Раз в полгода.
- Тяжелая служба: Квартал.
Периодическая проверка - это глубокое погружение в состояние подъемника. Она включает в себя:
- Тщательный осмотр всех компонентов выявленные в ходе ежедневной проверки.
- Детальный осмотр цепи, включая измерение участка цепи на растяжение, которое является ключевым индикатором перегрузки или усталости. Для измерения износа звеньев цепи используются штангенциркули.
- Открытие электрических и контрольных панелей проверьте, нет ли ослабленных соединений, перетертых проводов или признаков перегрева.
- Осмотр тормозной системы проверьте износ тормозных колодок и правильность регулировки.
- Проверка зубчатой передачи проверьте уровень смазки и наличие признаков износа.
- Осмотр колес тележки и опорной конструкции на предмет износа и целостности.
Любой компонент, который не соответствует стандартам производителя'или нормативным требованиям, должен быть заменен.
Графики смазки и замены компонентов
Как и любое механическое устройство, подъемник нуждается в надлежащей смазке для правильной работы. В коробке передач содержится масло или смазка, которые уменьшают трение и отводят тепло. В руководстве производителя указан тип смазки и интервал между проверкой уровня и заменой.
Грузовая цепь также нуждается в смазке. Правильно смазанная цепь имеет гораздо больший срок службы, поскольку смазка уменьшает трение между шарнирными звеньями и обеспечивает защиту от коррозии. Обычно рекомендуется использовать легкое проникающее масло.
Со временем некоторые компоненты изнашиваются и подлежат замене. К ним относятся такие детали, как тормозные диски, контакторы на панели управления и сама грузовая цепь. Проактивная программа технического обслуживания будет следовать указаниям производителя о предполагаемом сроке службы этих деталей и планировать их замену, а не ждать, пока они выйдут из строя в процессе эксплуатации, что приведет к незапланированным простоям.
Ведение учета: Невоспетый герой технического обслуживания
Последним и, возможно, самым важным элементом успешной программы технического обслуживания является тщательный учет. Для каждого подъемника должен вестись специальный журнал или цифровой файл. Эти записи должны включать в себя:
- Уникальный серийный номер подъемника'и дата ввода в эксплуатацию.
- Запись всех ежедневных контрольных списков.
- Подробные отчеты о каждой периодической проверке, подписанные и датированные инспектором, с перечислением всех обнаруженных недостатков и предпринятых корректирующих действий.
- Журнал всех работ по техническому обслуживанию и ремонту, включая замену деталей и добавление смазочных материалов.
Эта документация создает полную историю обслуживания подъемника. Она неоценима для отслеживания характера износа, составления графика будущего обслуживания и демонстрации соблюдения правил безопасности во время аудита. Правильно веденный журнал - это доказательство приверженности компании к безопасности и ответственному владению оборудованием. Он превращает техническое обслуживание из серии разрозненных событий в структурированную, основанную на данных программу управления активами.
Часто задаваемые вопросы (FAQ)
В чем разница между электрической цепной и электрической канатной талью?
В электрических цепных талях в качестве подъемного механизма используется термообработанная, калиброванная грузовая цепь, которая зацепляется со специальным карманным колесом внутри тали. В канатных талях используется стальной трос, наматываемый на рифленый барабан. Для большинства небольших подъемных устройств (менее 5 тонн) чаще всего используются цепные тали благодаря их компактности, долговечности, истинному вертикальному подъему и устойчивости к перекручиванию. Канатные тали обычно предпочтительнее для очень высоких скоростей, большой высоты подъема или чрезвычайно высокой грузоподъемности.
Как определить правильную грузоподъемность для моих нужд?
Чтобы определить правильную грузоподъемность, вы должны определить абсолютный максимальный вес, который вам когда-либо придется поднимать, а не средний. Проведите ревизию всех потенциальных грузов в вашей работе. Определив самый тяжелый груз, выберите подъемник с номинальной грузоподъемностью не менее этого веса, а лучше немного выше, чтобы обеспечить запас прочности. Никогда не выбирайте подъемник, основываясь на типичном или среднем весе груза.
Можно ли использовать небольшой электрический подъемник на открытом воздухе?
Да, но вы должны выбрать подъемник, специально предназначенный для использования вне помещений. Ключевой характеристикой, которую необходимо проверить, является степень защиты от проникновения (IP). Подъемник, установленный в помещении, может иметь степень защиты только IP54. Для использования на улице, где подъемник будет подвергаться воздействию дождя и пыли, вам нужна модель с более высоким классом, например IP65 или IP66, что означает защиту от водяных струй. Кроме того, компоненты могут нуждаться в специальной краске или покрытии для повышения коррозионной стойкости.
Какое обслуживание требуется малой электрической тали?
Небольшая электрическая таль требует двухуровневой программы технического обслуживания. Во-первых, оператор должен ежедневно проводить предварительный осмотр, чтобы выявить очевидные проблемы с крюком, цепью и органами управления. Во-вторых, официальный периодический осмотр должен проводиться обученным специалистом через определенные промежутки времени (например, ежегодно или чаще при интенсивном использовании) в соответствии с требованиями нормативных документов и производителя. Этот детальный осмотр включает в себя измерение износа и растяжения цепи, проверку тормозов и электрических компонентов. Также необходимо регулярно смазывать цепь и коробку передач.
Насколько важен показатель рабочего цикла?
Показатель рабочего цикла очень важен, так как он определяет выносливость подъемника'. Он показывает, как часто и как долго подъемник может работать без перегрева двигателя. Легкий подъемник, используемый в условиях высокой производительности, очень быстро выйдет из строя. Вы должны честно оценить свой рабочий процесс - количество подъемов в час и среднюю нагрузку - и выбрать подъемник с рейтингом рабочего цикла FEM/ISO, который соответствует или превышает ваши рабочие требования, чтобы обеспечить длительный срок службы.
В чем преимущество двухскоростного подъемника?
Двухскоростной подъемник дает значительные преимущества в производительности и точности. Он обеспечивает стандартную высокую скорость для быстрого подъема или опускания груза через открытое пространство, что повышает эффективность. Кроме того, он обеспечивает гораздо более медленную "ползучую" скорость для последних моментов размещения груза. Эта медленная скорость обеспечивает оператору тонкий контроль, что неоценимо при размещении деликатных, дорогих или сложных грузов, значительно снижая риск столкновения и повреждения.
Лучше ли беспроводной пульт дистанционного управления, чем подвесной?
Беспроводной пульт часто считается лучшим с точки зрения безопасности и гибкости. Он позволяет оператору стоять в стороне от груза, выбирая наилучшую точку обзора и оставаясь вне зоны подъема. Это существенно повышает безопасность. Однако проводной кулон обеспечивает надежную работу без батарей и потери сигналов. Выбор зависит от области применения, но преимущества беспроводного пульта в плане безопасности делают его очень рекомендуемым вариантом для многих пользователей.
Заключение
Выбор малой электрической тали - задача, требующая тщательного обдумывания, выходящая далеко за рамки простого сравнения цены и максимального веса подъема. Это упражнение на понимание сложной взаимосвязи между инструментом и его предназначением. Успешный выбор рождается из целостного анализа, который взвешивает грубую силу грузоподъемности против выносливости рабочего цикла, а универсальность крепления крюка против точности крепления проушины. Для этого необходимо, чтобы безопасность была в приоритете, что проявляется в тщательном изучении тормозных систем, концевых выключателей и защиты от перегрузок.
Путь от выбора до эксплуатации состоит из методичных шагов - тщательной установки, проверенного ввода в эксплуатацию и неуклонного соблюдения режима осмотра и технического обслуживания. Приняв этот комплексный подход, рассматривая подъемник не как изолированный объект, а как сердце более крупной подъемной экосистемы, вы превращаете простую покупку в стратегическую инвестицию. Вы приобретаете не просто машину, а надежного, безопасного и продуктивного партнера в вашей повседневной работе, идеально приспособленного к уникальным требованиям вашего рабочего пространства и рабочего процесса. Осознанное решение гарантирует, что этот мощный инструмент будет безопасно и эффективно расширять ваши возможности на протяжении многих лет.
Ссылки
Американское общество инженеров-механиков. (2021). ASME B30.16-2021: Подвесные подъемники (подкосы). ASME.
Исполнительный орган по охране труда и технике безопасности. (n.d.). Положения о подъемных работах и подъемном оборудовании 1998 года (LOLER). HSE. Извлечено из
Коваль, Х. (2019, 12 ноября). Руководство по цитированию APA (7-е издание): Внутритекстовое цитирование. LibGuides. Извлечено из
Управление по охране труда и здоровья. (n.d.-a). Краны и вышки в строительстве: Такелажное оборудование. Министерство труда США. Получено из
Управление по охране труда и здоровья. (n.d.-b). Мостовые и козловые краны - 1910.179. Министерство труда США. Извлечено из
Университет Пердью. (2024). Внутритекстовое цитирование: Основы. Онлайновая лаборатория письма Пердью. Извлечено из https://owl.purdue.edu/owl/research_and_citation/apa_style/apa_formatting_and_style_guide/in_text_citations_the_basics.html
Шнайдер, М. П. (2002). Подъемные устройства с нижним расположением крюка. Машиностроение, 124(11), 10. https://doi.org/10.1115/1.2002-NOV-7
Веррит, Р. (2014). Новые правила FEM для проектирования серийных подъемных устройств (9.511) и кранов (9.341). Штальбау, 83(S1), 36-44. https://doi.org/10.1002/stab.201490209