Tóm tắt
Việc triển khai đúng cách một tời điện là vấn đề liên quan đến vật lý ứng dụng, khoa học vật liệu và kỷ luật quy trình, thể hiện sự kết hợp giữa sức mạnh và trách nhiệm. Nghiên cứu về việc sử dụng thiết bị này cho thấy rằng hoạt động an toàn và hiệu quả không chỉ đơn thuần là việc bật công tắc. Nó đòi hỏi sự hiểu biết toàn diện về các bộ phận cơ khí của tời, các nguyên lý động lực học tải trọng và các quy trình lắp đặt bắt buộc phải tuân thủ. Phân tích này xem xét toàn bộ vòng đời của một hoạt động tời, từ đánh giá hiện trường ban đầu và kiểm tra thiết bị đến việc thực hiện các thao tác kéo phức tạp và bảo trì sau khi sử dụng. Nó đánh giá các quy trình ra quyết định quan trọng liên quan đến việc lựa chọn điểm neo, cấu hình hệ thống dây cáp với các phụ kiện như ròng rọc và dây đai chịu lực cao, cũng như quản lý các lực khổng lồ được tạo ra. Bằng cách phân tích quy trình thành một chuỗi các hành động có chủ đích, hướng dẫn này nhằm mục đích nuôi dưỡng năng lực chuyên môn sâu sắc cho người vận hành. Mục tiêu là biến hoạt động tời kéo từ một nhiệm vụ tiềm ẩn nguy hiểm thành một thực hành kỹ thuật có kiểm soát, lặp lại được và an toàn, có thể áp dụng trong các bối cảnh toàn cầu đa dạng, từ các hoạt động khai thác mỏ ở Nam Mỹ đến cứu hộ ngoài đường ở Trung Đông.
Những điểm chính
- Luôn tiến hành kiểm tra kỹ lưỡng tời, dây cáp và tất cả các bộ phận của hệ thống dây cáp trước khi sử dụng.
- Chọn một điểm neo chắc chắn có thể chịu được toàn bộ lực kéo.
- Sử dụng ròng rọc để tăng lực kéo và thay đổi hướng kéo một cách an toàn.
- Để thành thạo cách sử dụng tời điện, bạn cần duy trì lực kéo chậm rãi, có kiểm soát và ổn định.
- Không bao giờ được bước qua dây tời đang căng; luôn giữ khoảng cách an toàn.
- Cuộn lại dây tời với lực căng nhẹ để tránh hư hỏng và đảm bảo các lớp dây được xếp chồng lên nhau đúng cách.
- Hãy đeo găng tay chịu lực và sử dụng dây móc trong tất cả các thao tác xử lý dây cáp.
Mục lục
- Hiểu về tời điện: Nền tảng cho việc vận hành an toàn
- Bước 1: Kiểm tra kỹ lưỡng trước khi sử dụng và đánh giá hiện trường
- Bước 2: Thiết lập điểm neo an toàn
- Bước 3: Nắm vững nghệ thuật lắp đặt hệ thống dây cáp
- Bước 4: Kéo có kiểm soát: Thực hiện thao tác
- Bước 5: Các thủ tục sau phẫu thuật
- Bước 6: Các kỹ thuật sử dụng tời nâng cao trong các tình huống phức tạp
- Bước 7: Bảo trì và chăm sóc lâu dài
- Bối cảnh tổng quan về thiết bị nâng và kéo
- Câu hỏi thường gặp (FAQ)
- Một suy nghĩ cuối cùng về trách nhiệm và sự thành thạo
- Tài liệu tham khảo
Hiểu về tời điện: Nền tảng cho việc vận hành an toàn
Trước khi có thể thực sự nắm vững cách sử dụng tời điện, người dùng trước tiên phải làm quen sâu sắc với chính công cụ này. Tời điện không phải là một vật thể đơn nhất mà là một hệ thống phức tạp gồm các bộ phận tương tác với nhau, mỗi bộ phận đều có chức năng cụ thể và điểm yếu riêng. Vận hành nó mà thiếu kiến thức nền tảng này cũng giống như nói một ngôn ngữ mà chỉ biết vài câu; bạn có thể hoàn thành một nhiệm vụ đơn giản, nhưng sẽ không sẵn sàng đối mặt với những sắc thái, sự phức tạp hay tình huống khẩn cấp. Máy tời là sự kết hợp giữa năng lượng điện, hệ thống truyền động cơ khí và độ bền vật liệu. Mục đích của nó là chuyển đổi chuyển động quay tốc độ cao, mô-men xoắn thấp của động cơ điện thành lực kéo tốc độ thấp, mô-men xoắn cao, thể hiện qua hàng nghìn pound lực tác động qua dây cáp thép hoặc dây thừng tổng hợp. Sự chuyển đổi này là cốt lõi của sức mạnh của tời, và hiểu được quá trình này là bước đầu tiên để thành thạo việc sử dụng nó. Chúng ta phải vượt ra khỏi cái nhìn hời hợt về tời như một "thiết bị kéo" đơn giản và xem nó như một hệ thống kỹ thuật đòi hỏi sự tôn trọng, kiến thức và cách xử lý có phương pháp.
Cấu tạo của tời điện: Phân tích chi tiết thiết bị
Để bắt đầu cuộc tìm hiểu, chúng ta hãy mổ xẻ chiếc tời, xem xét các bộ phận cấu thành của nó không chỉ như một danh sách cần ghi nhớ, mà như những cơ quan trong một cơ thể đang hoạt động.
-
Động cơ điện: Đây là trái tim của hệ thống. Được cấp nguồn từ ắc-quy của xe, động cơ tạo ra lực quay ban đầu. Đó có thể là động cơ cuộn dây nối tiếp, nổi tiếng với mô-men xoắn cao nhưng cũng dễ sinh nhiệt khi hoạt động dưới tải, hoặc động cơ nam châm vĩnh cửu, hiệu quả hơn cho các ứng dụng nhẹ và không liên tục. Việc xác định loại động cơ mà tời của bạn sở hữu sẽ giúp bạn hiểu rõ hơn về chu kỳ làm việc của nó — tỷ lệ thời gian nó có thể hoạt động so với thời gian cần thiết để làm mát. Bỏ qua chu kỳ làm việc là nguyên nhân phổ biến dẫn đến cháy động cơ, một sự cố có thể phòng ngừa được nhưng lại xuất phát từ sự thiếu kiên nhẫn.
-
Hệ thống bánh răng: Đây chính là “cơ bắp” của tời, một hệ thống bánh răng hành tinh đóng vai trò như bộ nhân mô-men xoắn. Vòng quay tốc độ cao, mô-men xoắn thấp của động cơ được truyền vào hệ thống bánh răng và, qua một chuỗi các bước giảm tốc, được chuyển đổi thành vòng quay chậm nhưng mạnh mẽ của trống tời. Tỷ số truyền (ví dụ: 265:1) cho biết động cơ phải quay bao nhiêu vòng để trống quay một vòng. Tỷ số cao hơn có nghĩa là lực kéo lớn hơn nhưng tốc độ dây chậm hơn. Lợi thế cơ học này là nguyên lý cốt lõi cho phép một động cơ nhỏ di chuyển một phương tiện nặng hàng tấn.
-
Trống tời: Đây là trục cuộn mà dây tời được quấn quanh. Thiết kế của nó đóng vai trò quan trọng trong việc điều khiển dây, ngăn dây bị rối và đảm bảo dây được cuộn đều. Đường kính của trục cuộn cũng ảnh hưởng đến lực kéo của tời; lực kéo mạnh nhất ở lớp dây đầu tiên (gần trục cuộn nhất) và giảm dần ở các lớp tiếp theo khi đường kính hiệu dụng tăng lên.
-
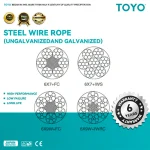
Dây tời (dây thừng hoặc cáp): Đây là bộ phận then chốt của hệ thống, là thành phần truyền lực từ tời đến tải. Việc lựa chọn giữa cáp thép và dây thừng tổng hợp là một quyết định quan trọng, có ảnh hưởng sâu sắc đến an toàn và việc vận hành, điều mà chúng ta sẽ phân tích chi tiết.
-
Hệ thống phanh: Một tính năng an toàn quan trọng nhưng thường bị bỏ qua. Phanh, thường là một hệ thống cơ khí tự động, sẽ kích hoạt ngay khi động cơ ngừng hoạt động. Chức năng của nó là giữ tải chắc chắn, ngăn không cho trống bị tuột sợi dưới tác động của lực căng. Một hệ thống phanh đáng tin cậy chính là yếu tố quyết định giữa việc dừng máy một cách an toàn và một sự cố nghiêm trọng.
-
Cần gạt ly hợp (Cần gạt ly hợp tự do): Cơ chế này giúp ngắt kết nối trống với hệ thống bánh răng, cho phép kéo dây ra bằng tay (quá trình này được gọi là "freespooling"). Cách này hiệu quả hơn nhiều so với việc sử dụng động cơ để kéo dây ra. Hiểu cách kết nối và ngắt kết nối ly hợp một cách trơn tru là một kỹ năng vận hành cơ bản.
-
Bộ dẫn dây: Đây là bộ dẫn hướng cho dây tời, giúp ngăn dây cọ xát vào miếng đệm hoặc giá đỡ của tời khi cuộn vào hoặc thả ra. Có hai loại chính: bộ dẫn hướng con lăn (roller fairlead), sử dụng bốn con lăn để dẫn hướng dây cáp thép, và bộ dẫn hướng Hawse, một bộ dẫn hướng bằng nhôm trơn tru, bo tròn, được thiết kế riêng cho dây thừng tổng hợp. Việc sử dụng loại bộ dẫn hướng không phù hợp sẽ nhanh chóng làm hỏng dây tời của bạn.
Khi hiểu rõ cấu tạo này, bạn sẽ bắt đầu nhìn nhận tời không còn là một “hộp đen” nữa, mà là một hệ thống nhân quả rõ ràng. Bạn sẽ hiểu rằng nhiệt sinh ra từ động cơ, sức mạnh đến từ các bánh răng, còn sự an toàn phụ thuộc vào phanh và độ bền của dây cáp. Kiến thức này chính là nền tảng vững chắc để xây dựng mọi quy trình vận hành an toàn.
Vật lý của lực kéo: Hiểu về tải trọng, ma sát và lợi thế cơ học
Việc sử dụng tời là một bài thực hành về vật lý ứng dụng. Khi bạn học cách sử dụng tời điện, bạn đang trở thành một nhà vật lý thực hành, biết cách điều khiển các lực để đạt được kết quả mong muốn. “Tải trọng” không chỉ đơn thuần là trọng lượng riêng của vật thể mà bạn đang kéo. Tổng lực cản mà tời của bạn phải vượt qua là sự kết hợp của nhiều yếu tố.
- Tổng trọng lượng xe (GVW): Đây là điểm xuất phát, tức là trọng lượng ban đầu của phương tiện hoặc vật thể đang được trục vớt.
- Điện trở dốc: Kéo một vật lên dốc đòi hỏi phải vượt qua lực hấp dẫn. Độ dốc càng lớn, lực cản càng mạnh. Một chiếc xe nặng 4.000 pound trên một đoạn dốc 45 độ có thể tạo ra cảm giác như nó nặng thêm 2.800 pound đối với tời kéo.
- Điện trở bề mặt (Ma sát): Tính chất của mặt đất mà tải trọng đặt lên hoặc nằm trên đó tạo ra lực cản rất lớn. Việc kéo một chiếc xe qua vũng bùn sâu và đặc có thể dễ dàng làm tăng gấp đôi hoặc gấp ba lực cần thiết so với việc kéo xe trên mặt đường bằng phẳng. Ma sát của lốp xe bị sa lầy trong cát, lực hút của bùn, hoặc lực cản của một chiếc xe bị kẹt bánh trên tảng đá đều là những lực mạnh mẽ mà tời kéo phải vượt qua.
Một nguyên tắc chung là nên chọn tời có công suất định mức ít nhất gấp 1,5 lần tổng trọng lượng xe (GVW). Điều này tạo ra một biên độ an toàn để bù đắp cho các yếu tố cản trở bổ sung. Tuy nhiên, đây chỉ là điểm khởi đầu, không phải là quy tắc bất di bất dịch. Một chiếc xe nặng hơn trong tình huống đơn giản có thể cần lực kéo ít hơn so với một chiếc xe nhẹ hơn trong tình huống bị kẹt sâu. Đây là lúc phán đoán của người vận hành, dựa trên sự hiểu biết về các nguyên lý vật lý này, trở nên vô cùng quan trọng.
Khái niệm về lợi thế cơ học cũng đóng vai trò then chốt. Tời là một thiết bị tạo ra lợi thế cơ học, nhưng hiệu quả này có thể được tăng cường hơn nữa thông qua hệ thống dây cáp. Việc sử dụng ròng rọc để tạo lực kéo hai dây, một kỹ thuật mà chúng ta sẽ thảo luận sau, là một ví dụ điển hình. Bằng cách kéo dây tời ra đến điểm neo và quay trở lại xe, bạn thực tế đã giảm một nửa tốc độ dây nhưng gần như nhân đôi lực kéo của tời. Đây không phải là phép thuật; đây là ứng dụng trực tiếp của vật lý, phân bổ tải trọng trên hai dây thay vì một dây. Hiểu được điều này, người vận hành có thể sử dụng tời 9.000 pound để di chuyển an toàn một tải trọng mà nếu không có kỹ thuật này thì sẽ vượt quá khả năng chịu tải của tời rất nhiều.
Dây thừng tổng hợp so với cáp thép: Một lựa chọn quan trọng
Việc lựa chọn dây tời là một trong những quyết định quan trọng nhất mà người vận hành phải đưa ra, với những tác động trực tiếp đến an toàn, trọng lượng và khả năng vận hành. Không có loại dây nào được coi là vượt trội hơn hẳn; sự lựa chọn “tốt hơn” phụ thuộc vào mục đích sử dụng và các ưu tiên của người dùng. Hãy cùng phân tích kỹ lưỡng các đặc tính của chúng.
Dây cáp thép đã là lựa chọn truyền thống trong nhiều thập kỷ qua. Loại dây này có độ bền vượt trội và khả năng chống mài mòn cao. Nếu bạn thường xuyên sử dụng tời trong môi trường nhiều đá, dễ gây mài mòn, nơi dây có thể bị kéo qua các mép sắc nhọn, thì dây thép có lợi thế rõ rệt. Loại dây này cũng chịu nhiệt tốt hơn, điều này có thể là yếu tố quan trọng trong những lần kéo dài và nặng khiến trống tời nóng lên. Tuy nhiên, nhược điểm của nó cũng rất đáng kể. Dây cáp thép rất nặng, khiến việc xử lý trở nên khó khăn, đặc biệt khi phải mang một đoạn dây dài lên đồi dốc. Dây cáp thép dễ bị gãy thành các sợi nhọn ("jiggers") có thể dễ dàng xé rách găng tay và da, đòi hỏi sự cảnh giác liên tục và việc sử dụng găng tay da dày. Điều quan trọng nhất là, nếu dây cáp thép bị đứt khi đang chịu tải, nó sẽ tích trữ một lượng năng lượng động học khổng lồ. Năng lượng này được giải phóng một cách dữ dội, khiến dây cáp bị đứt quất qua không khí với tốc độ kinh hoàng, một hiện tượng có thể gây chết người và đã từng xảy ra. Đây là lý do tại sao phải luôn đặt một bộ giảm chấn dây (một tấm chăn nặng hoặc vật nặng chuyên dụng) lên dây cáp thép trong quá trình kéo.
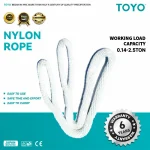
Dây thừng tổng hợp, thường được làm từ các vật liệu như Dyneema® (một thương hiệu của polyethylene trọng lượng phân tử cực cao), là giải pháp thay thế hiện đại. Ưu điểm chính của nó là tính an toàn. Khi dây thừng tổng hợp bị đứt, nó có khối lượng rất nhỏ và tích trữ ít năng lượng động học hơn nhiều. Nó có xu hướng rơi xuống đất thay vì quất mạnh, giúp giảm đáng kể nguy cơ chấn thương nghiêm trọng. Nó cũng cực kỳ nhẹ — nhẹ hơn tới 80% so với cáp thép có cùng độ bền — khiến việc mang vác và xử lý trở nên dễ dàng hơn nhiều. Nó nổi trên mặt nước, đây là một lợi thế đáng kể khi băng qua sông suối hoặc cứu hộ trong bùn lầy. Tuy nhiên, dây thừng tổng hợp cũng có những điểm yếu riêng. Nó rất dễ bị mài mòn và phải được bảo vệ khỏi đá nhọn, góc cạnh và thậm chí cả các rãnh dẫn dây thô ráp. Nó cũng dễ bị hư hỏng do nhiệt từ trống tời và bị xuống cấp do tiếp xúc với tia UV và cát bám vào. Nó đòi hỏi sự chăm sóc kỹ lưỡng hơn, bao gồm việc giặt thường xuyên để loại bỏ các hạt cát và bụi bẩn gây hại.
| Tính năng | Dây cáp thép | Dây thừng tổng hợp |
|---|---|---|
| An toàn (trong trường hợp vỡ) | Cực kỳ nguy hiểm (tích trữ năng lượng động học cao) | An toàn hơn đáng kể (khối lượng thấp, năng lượng giải phóng thấp) |
| Trọng lượng | Rất nặng | Rất nhẹ (nhẹ hơn tới 80%) |
| Xử lý | Difficult; prone to kinks and sharp burrs ("jiggers") | Easy; flexible, no sharp burrs, floats on water |
| Khả năng chống mài mòn | Tuyệt vời | Poor (requires protective sleeves on sharp edges) |
| Khả năng chịu nhiệt | Tốt | Poor (can be damaged by drum heat and friction) |
| Bảo trì | Requires lubrication; inspect for broken strands/kinks | Requires regular cleaning; inspect for frays/abrasion |
| Chi phí | Generally Lower | Generally Higher |
| Required Fairlead | Roller Fairlead | Hawse Fairlead |
Ultimately, the choice reflects a philosophy of use. Steel is the rugged workhorse for abrasive industrial settings. Synthetic is the modern choice for vehicle recovery, prioritizing safety and ease of handling, but demanding a higher degree of care and awareness from the operator.
When to Choose an Electric Winch Over Manual Chain Hoists or Lever Hoists
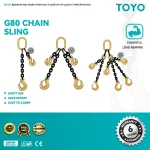
The electric winch is a specialized tool for pulling, but it exists within a broader family of material handling equipment. Understanding its unique place helps clarify its proper application. Consider, for example, the tời xích điều khiển bằng tay. A manual chain hoist, or chain block, is designed primarily for vertical lifting. Its gear system provides immense mechanical advantage, allowing a person to lift several tons by pulling on a hand chain. However, it is slow and designed for a controlled, vertical lift from a fixed overhead point. You would use a manual chain hoist to lift an engine out of a car, not to pull that car out of a ditch. The principles of load capacity are paramount for both, as poor calculations can lead to failure (Zoho Hoist, 2025).
A lever hoist is similar but uses a ratcheting lever mechanism instead of a hand chain. This makes it more portable and versatile for pulling, tensioning, and lifting over shorter distances. You might use a lever hoist to precisely position a heavy component or to tension a fence line. It offers more precision than a winch but lacks the speed and long pulling distance.
An electric winch excels in situations requiring a long, powerful, horizontal pull, often over difficult terrain. Its defining features are its speed (relative to manual devices) and its remote operation, which allows the operator to stand at a safe distance. While some winches are rated for lifting, most vehicle-mounted winches are designed specifically for pulling. Using a standard vehicle recovery winch for a vertical overhead lift is often a violation of its design parameters and a serious safety risk. For true vertical lifting, an tời xích điện is the appropriate tool, as it incorporates braking systems and load ratings specifically for that purpose (Weihua, 2025). The correct selection of equipment is a foundational safety principle (Jindiao Lifting, 2025). Therefore, the first step in knowing how to use an electric winch is knowing when to use it, and when another tool, like a manual chain hoist or lever hoist, is the more appropriate choice.
Bước 1: Kiểm tra kỹ lưỡng trước khi sử dụng và đánh giá hiện trường
The most critical moments of a winching operation often occur before the winch is even turned on. A culture of preventative diligence, of methodical inspection and thoughtful assessment, is the single greatest defense against accident and equipment failure. To rush this stage is to gamble with forces you do not fully respect. The professional operator approaches the scene not with an eagerness to pull, but with the cautious eye of a detective, gathering clues from the equipment and the environment to form a complete picture of the task ahead. This mindset is central to the responsible use of powerful tools.
The Daily Walk-Around: A Non-Negotiable Safety Ritual
Before every single use, the winch and all associated rigging gear must be inspected. This is not a cursory glance but a systematic, tactile examination. Think of it as a conversation with your equipment, where you are looking for signs of stress, wear, and damage.
- The Winch Itself: Begin at the winch mount. Is it secure? Check the bolts that attach it to the vehicle's frame or bumper. A loose mount can turn the entire winch into a projectile. Look for any cracks in the winch housing or the mounting plate. Inspect the electrical cables running from the battery. Are the connections tight and free of corrosion? Is the insulation intact, with no chafing or exposed wires? A poor electrical connection can not only prevent the winch from working but also create a fire hazard.
- Dây tời: This is perhaps the most critical part of the inspection.
- For Steel Cable: Wearing heavy leather gloves, spool out a significant portion of the cable. Run your gloved hand along its length, feeling for any broken strands ("jiggers"). A few broken strands are acceptable over the life of a cable, but clusters of them in one area indicate a weak spot that is likely to fail under load. Look for any signs of kinking, crushing, or severe corrosion. A kink is a permanent structural weak point and significantly reduces the cable's breaking strength.
- For Synthetic Rope: Visually inspect the entire working length for signs of abrasion, fraying, or "glassing" (where friction has melted the fibers, creating a hard, shiny surface). Pay close attention to the first few feet near the hook, as this area often sees the most wear. Feel the rope for embedded particles like sand or grit, which act like internal sandpaper, severing the fibers from within. If the rope is dirty, it must be cleaned before use. Any significant cuts or abrasions that affect more than a quarter of the rope's diameter are grounds for replacement.
- The Hook: Examine the hook. Does the safety latch work properly, springing back into place? Is the hook deformed in any way? A hook that has been "opened up" or bent is a sign of overloading and must be replaced immediately.
- The Rigging Gear: Every piece of gear that will be part of the pull must be inspected. Check your shackles (D-rings) for any signs of deformation or cracking. Make sure the pin threads in smoothly and seats fully. Inspect your tree trunk protector and any high-tensile slings for cuts, tears, or damaged stitching. If you plan to use a snatch block, ensure the sheave (the wheel) turns freely and there are no cracks in the side plates.
This ritual should be so ingrained that it becomes automatic. It is the operator's first and best opportunity to prevent an accident before the forces are even applied.
Assessing the Environment: Ground Conditions, Obstacles, and Anchor Points
With the equipment verified, you must now turn your analytical gaze to the environment. The situation dictates the strategy. What story does the scene tell you?
- Analyze the "Stuck": How is the vehicle immobilized? Is it bogged down in mud, sand, or snow? Is it high-centered on a rock or log? Is it on a steep, off-camber slope? The nature of the "stuck" determines the direction and amount of force required. A vehicle mired in deep mud has tremendous suction forces holding it, requiring a powerful, steady pull. A vehicle on a slope might require a pull that is both upwards and forwards.
- Survey the Pulling Zone: Look at the entire area between your winching vehicle and the vehicle to be recovered. What obstacles lie in the path? Are there rocks, trees, or ditches that the recovered vehicle will need to navigate once it starts moving? Your pull must not only free the vehicle but also guide it to a safe, stable location.
- Identify Potential Anchor Points: Scan your surroundings for viable anchors. A healthy, substantial tree is often the best option. A large boulder can also work, provided it is well-seated in the ground. Another heavy vehicle can serve as an anchor. What you are looking for is something unquestionably stronger than the force your winch will generate. A small tree, a dead stump, or a decorative rock are not anchor points; they are potential projectiles.
- Establish Safety Zones: Mentally (or physically) mark out the danger zone. The primary danger zone is an area to the sides of the winch line, forming a cone shape from the winch to the anchor. Never stand inside this zone. If the line breaks, it will most likely snap sideways. You must also establish a "no-go" zone directly under the tensioned line. No person should ever step over or stand near a winch line under load. The safe zones are far to the sides, or inside a vehicle. Before the pull begins, everyone not directly involved in the operation must be moved to a safe location. This is a non-negotiable rule of how to use an electric winch.
Calculating the Load: Beyond the Obvious
As discussed in the physics section, calculating the true load is an art informed by science. You have your vehicle's base weight (GVW). Now you must add the estimated resistance from the environment.
| Resistance Factor | Mô tả | Estimated Added Load (Multiplier on GVW) |
|---|---|---|
| Level, Hard Surface | Rolling resistance on pavement or hard dirt. | 1.0x (Base GVW) |
| Bùn/cát/tuyết ở vùng nước nông | Lốp xe bị lún một phần. | 1,5–2,0 lần |
| Bùn lầy/Cát/Tuyết | Lốp xe bị lún sâu đến trục; lực hút là một yếu tố. | 2,0–3,0 lần |
| Độ dốc vừa phải (15–30°) | Cần thêm lực để chống lại lực hấp dẫn. | Cộng thêm 25-50% trọng lượng toàn xe (GVW) vào tổng số. |
| Độ dốc lớn (30–45°) | Lực cản trọng lực đáng kể. | Cộng thêm 50-70% vào tổng trọng lượng xe. |
Ví dụ tính toán: Hãy tưởng tượng một chiếc xe nặng 5.000 lb (2.270 kg) bị lún sâu trong bùn trên một đoạn dốc nhẹ 15 độ.
- Trọng lượng cơ bản: 5.000 pound
- Khả năng chống bám bùn: Hãy thận trọng và ước tính hệ số nhân là 2 đối với bùn lầy. 5.000 lbs × 2 = 10.000 lbs lực.
- Kháng lực nghiêng: Một độ dốc 15 độ làm tăng trọng lượng tổng thể (GVW) thêm khoảng 251 lbs. 0,25 × 5.000 lbs = 1.250 lbs.
- Tổng tải trọng ước tính: 10.000 lbs + 1.250 lbs = 11.250 lbs.
Tời và hệ thống dây cáp của bạn phải có công suất định mức đủ để chịu tải trọng 11.250 pound này. Nếu bạn đang sử dụng tời có công suất 9.500 pound, bạn đã vượt quá khả năng chịu tải của nó. Đây là dấu hiệu rõ ràng cho thấy bạn phải sử dụng ròng rọc để tạo lực kéo hai dây, điều này sẽ gần như nhân đôi công suất hiệu dụng của tời lên khoảng 19.000 pound, đưa hoạt động trở lại mức an toàn. Khả năng tính toán nhanh chóng tại chỗ này là dấu hiệu đặc trưng của một người vận hành có năng lực, người hiểu cách sử dụng tời điện không chỉ như một công cụ, mà còn như một hệ thống kỹ thuật.
Bước 2: Thiết lập điểm neo an toàn
Điểm neo là nền tảng của toàn bộ quá trình vận hành tời. Toàn bộ lực do tời tạo ra, được truyền qua dây cáp, sẽ dồn vào duy nhất điểm này. Nếu điểm neo bị hỏng, toàn bộ hệ thống sẽ sụp đổ. Sự cố tại điểm neo là một trong những tình huống nguy hiểm nhất trong quá trình vận hành tời, vì nó có thể dẫn đến việc dây cáp bị căng và các bộ phận nặng của hệ thống (như móc xích hoặc thậm chí chính chiếc neo) bị văng tung tóe trong không trung. Do đó, việc lựa chọn và chuẩn bị điểm neo đòi hỏi sự đánh giá thận trọng và cẩn trọng.
Hệ thống phân cấp các mỏ neo: Từ tự nhiên đến nhân tạo
Không phải tất cả các điểm neo đều giống nhau. Một người vận hành có kinh nghiệm sẽ đánh giá các điểm neo tiềm năng dựa trên một hệ thống phân cấp rõ ràng về độ tin cậy.
- Cây to lớn, tràn đầy sức sống: Đây thường được coi là tiêu chuẩn vàng của các điểm neo tự nhiên. Điều gì làm nên một cây “vững chắc”? Cây đó phải có đường kính ít nhất 12 inch (30 cm) và rễ bám sâu. Cây phải còn sống và khỏe mạnh. Một cây chết, dù to đến đâu, cũng có thể có lõi hoặc hệ thống rễ bị mục nát và có thể gãy hoặc bị nhổ bật gốc khi chịu tải trọng. Khi chọn cây, hãy kiểm tra phần gốc và mặt đất xung quanh nó. Mặt đất có vững chắc không? Một cây lớn mọc trên đất mềm, ngập nước có thể không vững chắc bằng một cây nhỏ hơn mọc trên mặt đất cứng, nhiều đá.
- Tảng đá lớn nằm lọt trong lòng đất: Một tảng đá khổng lồ có thể đóng vai trò như một điểm neo tuyệt vời, nhưng chỉ khi nó thực sự là một phần của cảnh quan. Một tảng đá chỉ đơn thuần nằm trên bề mặt, dù trông có to lớn đến đâu, cũng có thể bị lăn hoặc dịch chuyển bởi lực kéo khổng lồ từ tời. Bạn cần tìm một tảng đá ít nhất là bị chôn vùi một phần, một tảng đá đã nằm ở vị trí đó hàng thế kỷ. Hệ thống dây cáp phải được gắn thấp trên tảng đá để kéo vào phần nền vững chắc nhất của nó, từ đó giảm thiểu nguy cơ tảng đá bị lật.
- Các điểm neo được thiết kế chuyên dụng: Trong một số khu công nghiệp hoặc khu công viên địa hình, bạn có thể thấy các cọc neo được thiết kế chuyên dụng. Đây là những kết cấu thép được đổ bê tông hoặc đóng sâu xuống đất, được thiết kế đặc biệt để chịu được tải trọng lớn. Nếu có sẵn, đây là một lựa chọn tuyệt vời và đáng tin cậy.
- Một phương tiện khác: Một chiếc xe khác có thể đóng vai trò là điểm neo rất hiệu quả, nhưng việc này đòi hỏi phải tuân thủ một quy trình cụ thể. Chiếc xe làm điểm neo phải có trọng lượng tương đương hoặc lớn hơn chiếc xe cần cứu hộ. Chiếc xe này phải được đặt sao cho hướng về phía xe cần cứu hộ, phanh được kích hoạt, ở chế độ đỗ (đối với xe số tự động) hoặc ở số (đối với xe số sàn), và các bánh xe được chèn chốt. Dây tời phải được gắn vào một điểm cứu hộ được chứng nhận trên khung xe neo, tuyệt đối không được gắn vào móc kéo, trục hoặc các bộ phận hệ thống treo.
- Mỏ neo cố định / Mỏ neo an toàn (Phương án cuối cùng): Trong những trường hợp không có điểm neo tự nhiên hoặc từ phương tiện (như sa mạc hay đồng trống), bạn phải tự tạo ra một điểm neo. Điều này có thể thực hiện bằng một thiết bị chuyên dụng gọi là neo đất (trông giống như một cái cày nhỏ cắm sâu vào đất) hoặc bằng cách tạo ra một điểm neo "deadman". Phương pháp này bao gồm việc chôn một lốp dự phòng hoặc một khúc gỗ lớn theo chiều ngang trong một rãnh đào vuông góc với hướng kéo, và gắn dây tời vào đó. Đây là một kỹ thuật tốn nhiều công sức và phức tạp, chỉ được sử dụng khi không còn lựa chọn nào khác.
Nguyên tắc cốt lõi là luôn chọn điểm neo an toàn nhất và chắc chắn nhất có thể. Nếu bạn có bất kỳ nghi ngờ nào về độ chắc chắn của một điểm neo, đừng sử dụng nó. Hãy tìm một điểm neo tốt hơn, ngay cả khi điều đó có nghĩa là bạn phải dùng thêm dây hoặc thực hiện một thao tác kéo phức tạp hơn.
Nghệ thuật sử dụng ống bảo vệ thân cây: Bảo vệ thiên nhiên và thiết bị
Khi sử dụng cây làm điểm neo, việc sử dụng dây bảo vệ thân cây là yêu cầu bắt buộc. Đây là loại dây rộng, không co giãn, được làm từ sợi polyester siêu bền. Tuyệt đối không được quấn dây tời hoặc xích trực tiếp quanh thân cây.
Có hai lý do chính dẫn đến điều này, một lý do về mặt sinh thái và một lý do thực tiễn. Về mặt sinh thái, việc quấn dây cáp thép quanh thân cây và tác động lực hàng nghìn pound lên nó sẽ làm cây bị thắt cổ, cắt xuyên qua vỏ cây và lớp mô sinh trưởng bên dưới. Lớp cambium là phần sống của cây có chức năng vận chuyển chất dinh dưỡng. Làm hỏng lớp này sẽ giết chết cây. Là những người sử dụng môi trường ngoài trời có trách nhiệm, chúng ta có nghĩa vụ đạo đức là không để lại dấu vết và bảo vệ môi trường mà chúng ta đang tận hưởng. Sử dụng dụng cụ bảo vệ thân cây sẽ phân bổ lực tác động trên một diện tích rộng, ngăn ngừa thiệt hại này.
Trên thực tế, việc quấn dây cáp quanh chính nó để cố định vào cây sẽ gây hư hại nghiêm trọng cho dây cáp. Áp lực có thể làm đứt dây cáp, còn góc uốn cong gấp khúc có thể tạo ra điểm yếu. Quan trọng hơn, đây là một cách kết nối không an toàn. Dây cáp có thể bị tuột ra, và khi móc được gắn lại vào dây cáp, nó có thể tạo ra một điểm tập trung tải trọng nguy hiểm, làm suy yếu nghiêm trọng độ bền của dây cáp.
Quy trình đúng rất đơn giản:
- Quấn dây bảo vệ thân cây quanh phần gốc của cây làm điểm neo. Phần gốc là phần chắc chắn nhất.
- Luồn một đầu dây qua vòng lặp ở đầu kia, rồi thắt chặt dây lại cho vừa khít với thân cây.
- Luồn một chiếc móc D-ring qua hai vòng ở hai đầu dây đai. Đảm bảo rằng bạn đã luồn chốt móc qua cả hai vòng.
- Vặn chặt chốt móc cho đến khi vừa khít, sau đó nới lỏng lại khoảng một phần tư vòng. Điều này giúp ngăn chốt bị kẹt khi chịu tải, khiến không thể tháo ra sau này.
- Chiếc móc này giờ đây trở thành điểm gắn an toàn và đạt tiêu chuẩn cho móc tời của bạn.
Quy trình đơn giản chỉ mất năm giây này giúp bảo vệ cây, bảo vệ thiết bị của bạn và tạo ra một kết nối an toàn hơn rất nhiều. Đây là một bước không thể bỏ qua trong thực hành sử dụng tời chuyên nghiệp.
Sử dụng phương tiện khác làm điểm neo: Các quy trình và biện pháp phòng ngừa
Việc sử dụng một phương tiện thứ hai làm điểm neo là phương pháp phổ biến và hiệu quả, nhưng nó cũng tạo ra một loạt các yếu tố cần phải được kiểm soát. Người điều khiển phương tiện làm điểm neo sẽ trở thành một thành viên tích cực trong quá trình cứu hộ.
Positioning the Anchor Vehicle: The ideal position is directly in line with the vehicle being recovered. This creates a straight pull, which is the most efficient and safest configuration. The anchor vehicle should be on stable, level ground if possible.
Securing the Anchor Vehicle:
- Turn the engine on. This ensures the battery is being charged and that the power steering and brakes are active if needed.
- Apply the parking brake firmly.
- Place the transmission in Park (for an automatic) or in a low gear (for a manual).
- For added security, chock the wheels on the downhill side.
- The driver should remain in the vehicle, with their foot lightly on the brake pedal. They should not be actively driving or reversing, as this can create shock loads. Their role is to be a static anchor.
The Connection Point: This is a point of frequent and dangerous errors. You must only attach the winch line to a rated recovery point on the anchor vehicle. These are heavy-duty loops or hooks that are bolted or welded directly to the vehicle's frame. They are specifically designed to withstand the forces of a recovery.
You must NEVER attach a winch line to:
- A tow ball: Tow balls are designed for the sheer load of towing, not the immense tensile load of a winching recovery. They can and do snap off at the shank, becoming a deadly cannonball.
- The axle or suspension components: These parts are not designed for the pulling forces of a winch and can be bent or broken, leading to an expensive repair and a failed recovery.
- The bumper (unless it has integrated, frame-mounted recovery points): Most factory bumpers are cosmetic and will be torn off the vehicle.
Using a vehicle as an anchor requires clear communication and a shared understanding of the procedure between both drivers. It transforms a solo operation into a team effort, where each person's actions affect the other's safety. This is a critical lesson in how to use an electric winch as part of a system.
Bước 3: Nắm vững nghệ thuật lắp đặt hệ thống dây cáp
Rigging is the language of winching. It is the art and science of connecting the winch to the load using a system of ropes, straps, and hardware to safely and efficiently transmit force. A poor rigging setup can negate the power of the strongest winch, while a clever rigging configuration can amplify the capabilities of a smaller one. This is where the operator's knowledge and creativity come to the forefront. It is not enough to simply hook up and pull; one must understand the tools of rigging and how they interact with the forces at play.
The Role of Shackles, Snatch Blocks, and High-Tensile Slings
Your recovery kit should contain more than just the winch itself. A collection of high-quality rigging gear is essential. These are not accessories; they are fundamental components of the winching system.
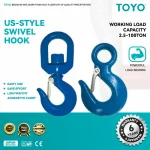
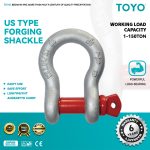
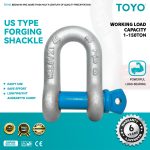
- Shackles (D-rings or Bow Shackles): These are the universal connectors in any rigging setup. They are used to connect your winch hook to a tree trunk protector, a recovery strap, or a vehicle's recovery point. Always use a shackle that is rated for a load significantly higher than your winch's capacity. When connecting, the winch hook should go through the body of the shackle (the "bow"), and the shackle pin should be attached to the strap or recovery point. Never "side-load" a shackle; the force should always be applied in a straight line along its intended axis. As mentioned before, tighten the pin fully, then back it off a quarter turn to prevent it from binding under load.
- Snatch Blocks: A snatch block is a heavy-duty pulley with a side plate that can be opened, allowing you to insert a loop of the winch line without having to thread the entire line through it. Its role is twofold and transformative. First, it can be used to nearly double your winch's pulling power (as we will explore in the advanced techniques section). Second, it can be used to redirect the pull. If your vehicle is not in a straight line with a good anchor point, you can use a snatch block attached to an anchor to change the direction of the line, allowing you to pull straight even if the anchor is off to the side. A snatch block is arguably the most powerful tool in your rigging kit, turning complex problems into simple geometric solutions.
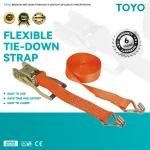
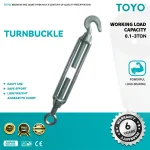
- High-Tensile Slings and Recovery Straps: These are distinct from simple tow straps. A recovery strap (or "snatch strap") is designed to stretch, storing kinetic energy to help "snatch" a vehicle free from being lightly stuck. These should not be used as part of a static winch pull, as the stretching can create unpredictable, dangerous movements. For winching, you need dây đai chịu lực cao or non-stretching straps, like a tree trunk protector or a rigging extension strap. These provide a predictable, static connection for extending your winch line or for creating complex rigging setups. Using the right type of strap is a crucial detail that distinguishes a knowledgeable operator.
Spooling Out the Line: Techniques for Preventing Bird-Nesting
With your anchor point established and your rigging plan in mind, it is time to get the winch line to the anchor. This is done by putting the winch in "freespool."
- Disengage the Clutch: Locate the clutch lever on your winch. It will typically have "Engaged" and "Disengaged" (or "Freespool") positions. Move the lever to the disengaged position. This disconnects the drum from the motor and gear train.
- Use the Hook Strap: Your winch should have come with a small strap attached to the hook. Use this strap to pull the line. Never put your fingers inside the hook. If the line were to unexpectedly retract, it could cause serious injury.
- Walk the Line to the Anchor: Pull the line out, walking it towards your prepared anchor point. Keep a slight tension on the line as you walk it out to prevent it from becoming a tangled mess on the ground.
- Avoid "Bird-Nesting": If you pull the line out too quickly without any resistance, it can cause the wraps on the drum to fluff up and tangle, creating a "bird's nest." This can cause the line to bind and become damaged when you start to pull. The best practice is to have a second person hold the line, providing a little bit of drag as you walk it out, ensuring it comes off the drum smoothly.
Pull out only as much line as you need to reach the anchor and set up your rigging. The more line you have out, the more it can stretch (even steel stretches slightly), and the more potential there is for it to encounter an unseen obstacle or abrasion point.
The Correct Way to Attach the Hook
The final connection is made at the shackle on your anchor strap.
- Remove the pin from your D-ring shackle.
- Place the winch hook onto the body of the shackle.
- Re-insert the shackle pin through the loops of your tree trunk protector (or other strap).
- Tighten the pin until it seats, then back it off a quarter turn.
Your connection sequence should be: Vehicle -> Winch -> Winch Line -> Hook -> Shackle -> Tree Trunk Protector -> Anchor Tree.
At this point, walk back to the winch and re-engage the clutch. You should hear or feel a solid "clunk" as the gear train reconnects with the drum. Gently tug on the line to ensure the clutch is properly engaged. The line should not pull out. Now you can use the remote control to slowly take up the slack in the line until it is taut. The system is now ready for the pull.
Understanding Line Angles and the Power of the Snatch Block
The geometry of your pull has a profound impact on the forces involved. A straight, direct pull is always the most efficient. However, the real world rarely offers such perfect scenarios. This is where a deep understanding of how to use a snatch block becomes a mark of true expertise.
Imagine you are stuck in a mud pit, and the only solid anchor tree is 90 degrees off to your side. If you were to pull directly towards that tree, you would pull your vehicle sideways, possibly making the situation worse or even tipping it over. You need to pull forward.
This is a classic scenario for a redirect pull using a snatch block.
- Run your winch line out to the anchor tree on your side.
- Attach the snatch block to the tree using a tree trunk protector and shackle.
- Run the winch line through the snatch block's pulley.
- Run the end of the line forward, to a second, lighter anchor point directly in front of your vehicle (this could be a smaller tree, a buried spare tire, or even just a stake in the ground, as it will bear much less force).
- Attach the winch hook to this second anchor point.
Now, when you winch in, the snatch block at the side anchor acts as a pivot. The force of the winch pulls the line towards the block, which translates into a forward pull on your vehicle. You have successfully changed the direction of the force. While this is an advanced technique, understanding the principle is fundamental. It shows how rigging is not just about connection, but about the intelligent manipulation of force vectors. This is the essence of mastering how to use an electric winch in complex, real-world conditions.
Bước 4: Kéo có kiểm soát: Thực hiện thao tác
This is the moment of action, where potential energy becomes kinetic energy and the work of recovery begins. It is also the moment of highest risk. The forces involved are immense, and the situation is dynamic. Control, communication, and constant observation are the guiding principles. The goal is not speed; it is progress. A slow, steady, and deliberate pull is infinitely safer and more effective than a fast, jerky one.
Communication is Key: Establishing Clear Signals
If you are working with a team—even a team of two—clear, simple, and pre-established communication is not just helpful; it is a critical safety protocol. Before the line is tensioned, everyone involved must agree on a set of hand signals. Shouting over the noise of an engine and a straining winch is unreliable.
A standard set of signals might include:
- Winch In (Pull): Thumb up, signaling "pull in the line."
- Stop: A flat, open hand held up, like a traffic cop. This signal means "stop everything immediately."
- Slack Off: Thumb down, signaling "pay out a little line."
The person with the best view of the entire operation—often someone standing far to the side, away from the line—should be the designated "spotter." The winch operator focuses on the remote and the winch itself, but acts only on the signals from the spotter. The driver of the recovered vehicle has their own role: to be ready to gently apply power or steering only when instructed to do so by the spotter. This chain of command prevents confusion and ensures everyone is working together.
Managing the Remote Control: Finesse Over Force
The winch remote, whether wired or wireless, is your direct interface with thousands of pounds of force. It should be handled with finesse.
- Dọn dẹp khu vực: Before you begin the pull, do one final visual sweep. Confirm that all people, pets, and unnecessary equipment are moved far away from the pulling zone. Announce loudly, "Winching! Stand clear!"
- Dampen the Line: Place a line damper on the winch line, roughly at its midpoint. A heavy blanket, a purpose-made vinyl damper, or even a heavy jacket will work. The purpose of the damper is to absorb and redirect the energy of the line should it break. A breaking steel cable will have its whipping motion arrested by the damper, causing it to fall to the ground. While less critical for synthetic rope, it is still good practice as it can help control a breaking line and serves as a highly visible warning that the line is under tension.
- Begin the Pull: Start with short, controlled bursts of power. Winch for a few seconds, then pause. Listen to the winch motor. Is it straining excessively? Watch the anchor point. Is there any sign of shifting or distress? Look at the line itself. Is it spooling evenly onto the drum? These initial short pulls allow the entire system to settle under load and give you a chance to spot any problems before they become critical.
- Maintain a Steady Pace: Once you are confident the system is secure, you can begin a more sustained, steady pull. The ideal pace is slow. You want the recovered vehicle to be moving at a slow walking pace. This minimizes shock loading on the equipment and gives the driver of the recovered vehicle time to steer.
- Assisting with the Wheels: The driver of the stuck vehicle should be behind the wheel, ready to help. Once the vehicle begins to move under the winch's power, the spotter can signal the driver to apply gentle throttle in the direction of travel. The wheels should be turning at the same speed the vehicle is being pulled. Spinning the wheels wildly will only dig the vehicle in deeper and can cause it to lurch forward, creating a dangerous shock load on the winch line. The winch should do the majority of the work; the vehicle's engine is there to assist, not to take over.
Respooling Under Tension: The Secret to a Healthy Winch Drum
How the line goes back onto the drum is critically important for the health of your winch line and the performance of your next pull. Never spool a line back onto the drum without tension. If you do, the outer wraps will be loose and can get pulled down in between the lower wraps when you put it under load later. This is called "diving" or "crushing," and it can severely damage or even sever a winch line, whether it is steel or synthetic.
The proper technique is to respool the line under a light, consistent load. This ensures the wraps lay tightly and evenly next to each other. After a recovery, if you have a long stretch of clear, level ground, you can achieve this by hooking the line to another vehicle or a fixed point and using the winch to pull your own vehicle forward, letting the drag of your vehicle provide the necessary tension.
If you are in the field and need to pack up, you can have a partner provide tension by holding the line (with gloves on!) and "walking" it back towards the winch as you power it in. They should stand well off to the side and simply provide drag, not try to hold the full force of the line. The goal is about 500 pounds of tension—enough to make a tight, neat wrap. A properly spooled drum is a sign of a professional who understands the subtleties of how to use an electric winch.
Monitoring the System: Watching for Signs of Strain
Throughout the entire pull, the operator and spotter must be vigilant, using their senses to monitor the health of the system.
- Listen: What does the winch motor sound like? A healthy motor under a heavy but manageable load will have a consistent, low-pitched hum. A high-pitched whine or a change in pitch can signal that the motor is being overloaded or the battery is failing. Clicks or grinding noises from the winch body could indicate a problem with the gear train.
- Watch: Keep your eyes moving. Scan from the anchor point, along the line, to the fairlead, and to the drum. Is the anchor shifting? Is the tree bending alarmingly? Is the line vibrating or oscillating? Is the line spooling correctly onto the drum, or is it piling up on one side? A pile-up can put immense pressure on the winch housing and must be corrected immediately by stopping the pull and adjusting the line's direction.
- Smell: An overheating electric motor has a distinct, acrid smell. If you smell this, stop the pull immediately. Your winch has exceeded its duty cycle and needs time to cool down. Continuing to pull will cause permanent damage to the motor windings.
Patience is a virtue in winching. If the pull is long and heavy, it is wise to pause every minute or so to let the winch motor cool and to give yourself a moment to re-evaluate the situation. This methodical, observant approach is what separates a successful recovery from a dangerous failure.
Bước 5: Các thủ tục sau phẫu thuật
The recovery is not over when the vehicle is free. A disciplined operator knows that the job is complete only when all equipment is safely and correctly stowed, inspected, and ready for the next use. Rushing the cleanup phase is a common mistake that leads to damaged equipment and creates safety hazards for the future. This final act of the winching process is a testament to an operator's professionalism and their respect for the tools.
Safely Disconnecting and Stowing Your Rigging Gear
Once the recovered vehicle is on stable ground and secured, the process of dismantling the rigging can begin.
- Secure the Recovered Vehicle: Ensure the recovered vehicle's parking brake is set, it is in park or gear, and, if necessary, its wheels are chocked. It must not be able to roll or move while you are disconnecting the rigging.
- Introduce Slack: With the winch, power out just enough line to create slack in the system. A few inches is all that is needed. This releases the tension from the shackles and straps, making them easy to disconnect.
- Disconnect the Hook: Wearing your gloves, walk to the anchor point. Remove the winch hook from the shackle. Use the hook strap, not your fingers.
- Retrieve Your Gear: Unscrew the pin from your shackle and remove it from your tree trunk protector or strap. Collect the strap. If you used a snatch block, retrieve it as well. Make a mental checklist of every piece of equipment you used: one tree protector, two shackles, one snatch block. Do a physical count to ensure nothing is left behind. Leaving a shackle on a tree is not only a loss of expensive equipment but also a hazard.
- Clean as You Go: Before you put your gear away, give it a quick inspection and cleaning. If your straps and shackles are covered in mud, rinse them with water if possible or at least knock off the heavy debris. Storing muddy gear accelerates corrosion and degradation. A muddy shackle pin can become difficult to operate.
Cleaning and Inspecting the Winch Line
The winch line has just been subjected to immense stress and potentially abrasive conditions. Now is the time for a post-operation inspection.
- For Steel Cable: As you spool the line back in (under tension, as described previously), perform another inspection. Look for any new damage that may have occurred during the pull—newly broken strands, kinks, or flat spots. If you find significant new damage, make a note of it. The cable may need to be shortened or replaced.
- For Synthetic Rope: This is especially important. Synthetic rope must be cleaned. If it was used in mud, sand, or dirty water, the rope is now filled with abrasive particles that will slowly destroy it from the inside out. When you get home, the rope should be spooled all the way out and washed thoroughly with a mild detergent and water, then allowed to air dry completely before being spooled back onto the winch. In the field, at a minimum, try to rinse it with clean water. As you spool it in, inspect it for any new frays, cuts, or abrasions that occurred during the pull.
This post-operation inspection is your first chance to catch damage and plan for repairs. It ensures that the next time you need your winch, it is in a safe, ready condition. This is a core tenet of responsible ownership and a key part of knowing how to use an electric winch over its entire lifecycle.
Securing the Winch for Transit
The final step is to secure the line and hook for travel.
- Spool the Line In: Spool the line in until the hook is a foot or two from the fairlead.
- Attach the Hook: There are several ways to secure the hook. Some winch bumpers have a dedicated tab for the hook. You can also attach it to a D-ring shackle mounted on your bumper. The goal is to keep the hook from swinging freely, where it could damage your bumper or grille, or get caught on an obstacle.
- Pre-Tension the Line: Once the hook is secured, power the winch in just enough to put the line under light tension. This keeps the hook from rattling and ensures the line stays tightly spooled on the drum. Do not overtighten it, as this puts unnecessary constant strain on the system. It should be just snug.
- Cover the Winch: If you have a winch cover, now is the time to put it on. A cover protects the winch and, more importantly, a synthetic rope from damaging UV rays and road grime. It also keeps the components clean and ready for the next deployment.
With the gear stowed, the line inspected and secured, and the winch covered, the operation is now truly complete. This methodical and tidy conclusion is not just about cleanliness; it is an integral part of the safety system, ensuring that your equipment is always in a known, reliable state.
Bước 6: Các kỹ thuật sử dụng tời nâng cao trong các tình huống phức tạp
Mastering the basics of a straight-line pull is the foundation. True expertise, however, reveals itself in the ability to solve complex recovery problems using advanced rigging techniques. These methods are applications of the physical principles we have discussed, using tools like snatch blocks and multiple anchor points to multiply force, change direction, and overcome seemingly insurmountable obstacles. These are not parlor tricks; they are essential tools for the serious operator who may encounter situations where a simple pull is insufficient or impossible. Learning these techniques is a significant step in your journey to fully understanding how to use an electric winch.
The Double-Line Pull: Doubling Your Power with a Snatch Block
This is perhaps the most common and most useful advanced technique. It allows you to nearly double the pulling capacity of your winch, making it possible to recover a load that is much heavier than your winch's rated single-line capacity.
The Scenario: You have an 8,000 lb winch, but your calculated load for a deeply mired vehicle is 12,000 lbs. A single-line pull would severely overload your winch.
The Procedure:
- Anchor a Snatch Block: Securely attach a snatch block to your chosen anchor point (e.g., a tree with a tree trunk protector and shackle).
- Run the Line: Spool your winch line out to the snatch block and run it through the pulley.
- Return the Line: Bring the end of the winch line back towards your own vehicle.
- Attach to Your Vehicle: Securely attach the winch hook to a rated recovery point on the frame of your own winching vehicle.
- The Physics at Work: You have now created a system with two lines running between your vehicle and the anchor point. The load is distributed across both lines. This has two effects:
- Power: The pulling force exerted on the load is nearly doubled. Your 8,000 lb winch can now exert a force approaching 16,000 lbs. (The gain is not exactly double due to friction in the pulley).
- Speed: The line speed is halved. Your winch has to pull in twice as much line to move the vehicle the same distance. This is a good thing—it makes the pull slower, more controlled, and easier on the winch motor.
The double-line pull is your best friend when faced with a very heavy load or when you want to reduce the strain on your winch for a smoother, safer recovery.
The Redirect Pull: Changing the Angle of Your Pull
We touched on this earlier, but it deserves a more detailed examination. This technique is used when the only suitable anchor is not in the desired direction of pull.
The Scenario: Your vehicle is in a ditch, and you need to pull it straight forward onto the road. However, the only strong anchor tree is located 45 degrees to the side.
The Procedure:
- Primary Anchor: Secure a snatch block to the anchor tree off to the side, using a tree protector and shackle.
- Run the Line: Run your winch line from your vehicle, through the snatch block on the side anchor.
- Secondary Anchor/Attachment Point: Continue the line from the snatch block to a point directly in front of your vehicle's intended path of travel.
- Attach the Hook: Secure the winch hook to this forward point. This point does not need to be as strong as the primary anchor, as it is mainly serving to establish the direction of the pull, but it should still be solid. In many cases, you can attach the hook back to the bumper or a recovery point on the stuck vehicle itself, creating a double-line pull that also redirects the force.
When you winch in, the line will try to straighten itself. The snatch block acts as a pivot, redirecting the pulling force from the side anchor into a forward pull on your vehicle. This allows you to pull a vehicle out of a tight spot or around an obstacle with precision. You can even use multiple snatch blocks and anchors to create complex, multi-angle pulls to navigate a vehicle through a difficult trail section.
Self-Recovery from Deep Mud or Steep Inclines
Sometimes, you are the one who is stuck, and you need to pull yourself out. The principles are the same, but the perspective is reversed.
The Scenario: Your vehicle is bogged down to its axles in mud, and there is a solid anchor tree 50 feet in front of you.
The Procedure:
- Hệ thống dây cáp: Spool out your winch line and attach it securely to the anchor tree. If the pull is expected to be very heavy, this is a perfect time to use a double-line pull. You would attach a snatch block to the anchor tree, run your line through it, and bring the hook back to a recovery point on your own vehicle.
- Operation: From the driver's seat (if you have an in-cab remote) or standing safely to the side, begin the controlled pull.
- Steering and Assisting: As the vehicle starts to move, you will need to be in the driver's seat to steer. Keep the front wheels pointed in the direction you want to go. As with an assisted recovery, apply gentle throttle once the vehicle is moving, matching the wheel speed to the speed of the winch pull.
- Patience on Inclines: When winching yourself up a steep hill, the process can be slow. It is often best to pull in short increments. Winch for 10-15 feet until you reach a more stable spot, then pause. Secure the vehicle with its brakes, and if necessary, chock the wheels. This allows your winch motor and your vehicle's battery to rest. You can then reset your rigging if needed and pull the next section. This "leapfrogging" method is much safer and more sustainable than attempting a single, long, continuous pull up a difficult slope.
These advanced techniques require practice in a safe, controlled environment before you attempt them in a real recovery situation. They elevate the act of winching from a simple pull to a form of problem-solving, empowering the operator to overcome a much wider range of challenges. A deep understanding of these methods is what truly defines an expert in how to use an electric winch.
Bước 7: Bảo trì và chăm sóc lâu dài
An electric winch is a significant investment, and like any piece of precision machinery, its longevity and reliability depend on a consistent schedule of maintenance and care. The harsh environments in which winches operate—mud, water, dust, and extreme loads—take their toll. A proactive maintenance philosophy, where problems are anticipated and prevented rather than simply reacted to, will ensure your winch is ready to perform when you need it most. Neglect is the most common cause of winch failure.
Creating a Maintenance Schedule: A Proactive Approach
Instead of waiting for something to break, establish a simple, repeatable maintenance schedule based on your usage.
- After Every Use: As detailed in Step 5, clean and inspect the line and rigging gear. This is your first line of defense.
- Monthly (for frequent users) or Quarterly (for occasional users):
- Operate the Winch: Power the winch in and out for a minute or so without any load. This helps to redistribute the grease in the gearbox and keeps the electrical contacts and motor brushes clean.
- Check Electrical Connections: Inspect the heavy-gauge wires running from the battery to the winch control box and motor. Ensure the connections are tight, clean, and free of corrosion. A wire brush and some dielectric grease can prevent future corrosion issues at the terminals.
- Inspect the Mount: Re-check the tightness of the bolts securing the winch to its mounting plate and the plate to the vehicle. Vibrations can cause these to loosen over time.
- Full Line Inspection: Spool the entire winch line out and inspect it from end to end for damage. This is a more thorough inspection than the quick check after each use.
- Hàng năm: This is the time for a more in-depth service.
- Gearbox Service: Depending on the manufacturer's recommendations and your level of mechanical comfort, this may involve opening the gearbox to inspect the gears and replace the grease. Old grease can become contaminated with water or dirt, losing its lubricating properties.
- Motor Service: Check the motor for signs of water ingress. If you do a lot of water crossings, this is particularly important. Some motors have drain plugs to release any accumulated moisture.
- Control Box (Solenoid Pack): Open the control box and inspect the solenoids or contactor. Look for corrosion, loose wires, or signs of arcing (black scorch marks).
This schedule may seem rigorous, but it is far less work than dealing with a failed winch in a remote location during a critical recovery.
Lubrication, Electrical Connections, and Mechanical Checks
Bôi trơn: The primary area requiring lubrication is the gearbox. Use only the grease type recommended by the winch manufacturer. Using the wrong type of grease can cause issues in cold weather or fail to protect the gears under high pressure. Steel wire rope also requires lubrication. A specialized wire rope lubricant penetrates the strands to lubricate internally and provides a protective coating against corrosion. Synthetic rope does not require lubrication.
Electrical System: The electrical system is the winch's lifeline. The winch motor draws a tremendous amount of current (upwards of 400 amps) under load, far more than any other accessory on your vehicle. This means the connections must be perfect. Any corrosion or looseness creates resistance, which generates heat, reduces power, and can lead to component failure or fire. Regularly cleaning battery terminals and winch connections is a simple but vital task. Ensure the cables are routed away from sharp edges or hot exhaust components to prevent chafing and short circuits.
Mechanical Checks: The feel and sound of your winch can tell you a lot. Does the clutch lever engage and disengage smoothly? If it is stiff, the mechanism may need cleaning and lubrication. When the winch is operating, are there any grinding or clicking sounds? These are indicators of potential gear damage or debris inside the housing. A healthy winch operates with a smooth, powerful hum.
When to Replace Your Winch Line or Seek Professional Service
Even with the best care, components wear out. Knowing when to retire a part is a critical safety judgment.
- Replacing a Steel Cable: A steel cable should be replaced if it has a noticeable kink, if it's been crushed or has flat spots, or if it shows a high concentration of broken wires in one area (e.g., more than 6 broken wires in one rope lay).
- Replacing a Synthetic Rope: A synthetic rope's life is determined by abrasion and UV exposure. It should be replaced if it shows significant fraying (a "fuzzy" appearance over large sections), has any cuts or gouges that affect more than 25% of its diameter, or shows signs of "glazing" or melting from heat. If the rope has been shock-loaded (e.g., used for a dynamic "snatch" recovery), its internal structure may be compromised, and it should be replaced even if it looks fine.
- Seeking Professional Service: If your winch is making unusual noises, if the brake is not holding a load securely, or if you have submerged the winch for an extended period, it is wise to have it serviced by a qualified technician. They can disassemble, inspect, and properly seal the unit, ensuring its internal components are sound. While many maintenance tasks can be done by the owner, a complete overhaul is often best left to the experts.
This commitment to long-term care completes the circle of responsible winch ownership. It ensures that the knowledge of how to use an electric winch is supported by a tool that is always in a state of maximum readiness and safety.
Bối cảnh tổng quan về thiết bị nâng và kéo
An electric winch, for all its power and utility, is but one instrument in a vast orchestra of material handling equipment. To achieve true mastery in this field, one must understand not only the winch but also its relatives: the hoists, clamps, and slings that perform related but distinct tasks. Situating the electric winch within this broader context allows for a more nuanced appreciation of its specific strengths and limitations, ensuring that the right tool is always selected for the job at hand. This is the essence of professional competence—knowing not just how to use a tool, but when and, crucially, when not to.
Comparing Electric Winches with Electric Chain Hoists for Vertical Lifts
A frequent point of confusion is the distinction between a winch and a hoist. While both can move heavy objects, their designs and intended applications are fundamentally different. As we have established, a vehicle recovery winch is a pulling device. An tời xích điện is a lifting device. This distinction is not arbitrary; it is rooted in their engineering and safety features.
An electric chain hoist, like those found in workshops and factories, is designed for true vertical, overhead lifting. Its braking system is typically more robust and is designed to suspend a load indefinitely without creeping. Its load chain is made of hardened, high-grade alloy steel specifically for lifting (Prolift, 2025). The entire unit is rated according to strict lifting standards that account for factors like dynamic loads and safety factors specifically for suspended objects (Zoho Hoist, 2025).
Attempting to use a standard vehicle winch for a vertical lift is a dangerous misapplication of the tool. The winch's brake is primarily designed to hold a load on an incline, not to suspend it overhead where a failure could be catastrophic. The layering of the rope on a winch drum also means its pulling (or lifting) capacity changes as the line spools in, a variable that is unacceptable for precise lifting operations. For any task that involves lifting a load off the ground and suspending it—such as lifting an engine, a piece of machinery, or construction materials—an electric chain hoist is the correct and only safe choice. Similarly, for manual lifting, a tời xích điều khiển bằng tay provides the control and safety features needed for the task.
The Utility of Lifting Clamps in Material Handling
When lifting or pulling, the connection to the object itself is as important as the device providing the force. While a vehicle has rated recovery points, many other objects do not. This is where specialized kẹp nâng become indispensable. Lifting clamps are mechanical devices designed to securely grip materials like steel plates, beams, or pipes, providing a safe lifting point.
There are various types of lifting clamps, each for a specific purpose:
- Kẹp đĩa: These use a jaw mechanism that tightens its grip as more load is applied. They are used for lifting steel plates in either a vertical or horizontal orientation.
- Kẹp dầm: These attach to the flange of an I-beam, providing a secure, temporary anchor point from which to hang a hoist.
- Pipe Clamps: These are designed to grip the curved surface of a pipe for lifting or pulling.
In an industrial or construction setting, using a combination of an electric chain hoist and the appropriate lifting clamp is standard procedure for safely moving heavy materials. One would never simply wrap a sling around a smooth steel plate and hope for the best; the risk of the load slipping is too great. Lifting clamps provide a positive, engineered connection.
This highlights a universal principle that applies equally to winching: the integrity of the entire system is only as strong as its weakest link. In a winching operation, your "weakest link" could be a poor anchor, a frayed rope, or an improperly attached hook. In a lifting operation, it could be an incorrectly used lifting clamp or a hoist that is not rated for the load. A comprehensive understanding of material handling requires an appreciation for all these components, from the tời đòn bẩy used for precise tensioning to the dây đai chịu lực cao that connect everything together. The professional operator knows how to use an electric winch, but they also know that it is part of a larger ecosystem of tools, and they have the wisdom to choose the right one for every task.
Câu hỏi thường gặp (FAQ)
What is the "duty cycle" of an electric winch and why does it matter? The duty cycle refers to the amount of time a winch can operate under load before it needs to cool down. It is expressed as a ratio of on-time to off-time. For example, a winch might have a duty cycle of 5% at full load, meaning for every minute of pulling, it needs 19 minutes of rest. Exceeding the duty cycle will cause the electric motor to overheat, which can lead to permanent damage. This is a crucial aspect of how to use an electric winch properly, especially during long, heavy pulls. Always check your manufacturer's specifications for the duty cycle.
Can I use my winch to lift something straight up? No, you should not use a standard vehicle recovery winch for vertical overhead lifting. These winches are designed as pulling devices. Their braking systems and rope spooling mechanisms are not designed or rated for the safety requirements of suspending a load overhead. For vertical lifting, you must use a device specifically designed for that purpose, such as a manual chain hoist or an electric chain hoist.
How much power does an electric winch draw from my car battery? An electric winch draws a very large amount of electrical current, often over 400 amps at full load. This is why you must always keep your vehicle's engine running during a winching operation. The engine runs the alternator, which replenishes the battery's charge. Without the engine running, a heavy pull can drain a standard car battery in just a few minutes, leaving you with a dead battery and an unfinished recovery.
What is the difference between a roller fairlead and a Hawse fairlead? A fairlead guides the winch line onto the drum. A roller fairlead uses four steel rollers and is designed exclusively for use with steel wire rope. A Hawse fairlead is a smooth, rounded piece of aluminum and is designed exclusively for use with synthetic winch rope. Using a steel cable on a Hawse fairlead will quickly gouge and ruin the aluminum, and using a synthetic rope on a roller fairlead can cause the rope to get pinched and frayed in the corners of the rollers. Using the correct fairlead for your line type is essential.
Why do I need to put a blanket or damper on the winch line? Placing a line damper (a heavy blanket, weighted vinyl damper, or even a heavy coat) on the midpoint of a tensioned winch line is a critical safety procedure, especially for steel cable. If the line breaks, it releases a tremendous amount of stored energy. The damper's weight helps to absorb this energy and forces the broken ends to fall to the ground instead of whipping through the air, which can be lethal. While synthetic rope stores less energy, using a damper is still a recommended best practice.
How do I know what size winch I need for my vehicle? A common and reliable guideline is to choose a winch with a rated pulling capacity of at least 1.5 times your vehicle's Gross Vehicle Weight (GVW). For example, if your truck weighs 6,000 pounds, you should look for a winch with a capacity of at least 9,000 pounds (6,000 x 1.5 = 9,000). This provides a crucial safety margin to account for the added resistance of mud, inclines, and other environmental factors you will encounter in a real recovery.
Is synthetic winch rope really better than steel cable? "Better" depends on the priority. For most recreational and vehicle recovery purposes, synthetic rope is considered superior due to its significant safety advantages (it doesn't store as much energy and is less dangerous if it breaks) and its light weight, which makes it much easier to handle. However, steel cable is more resistant to abrasion and is often preferred in highly abrasive industrial or rocky environments. The choice depends on a trade-off between the safety and handling of synthetic versus the raw durability of steel.
Một suy nghĩ cuối cùng về trách nhiệm và sự thành thạo
To learn how to use an electric winch is to enter into a pact of responsibility. It is to accept that you are wielding a tool capable of generating immense force, a force that can be constructive and liberating, or destructive and dangerous. Mastery is not found in the speed of the pull or the size of the winch. It is found in the quiet moments of preparation: the diligent inspection, the thoughtful assessment of the terrain, the careful selection of an anchor, and the precise construction of the rigging. It is found in the patience of a slow, controlled pull and in the discipline of a thorough post-operation cleanup.
This process is an exercise in practical ethics. It requires empathy for the environment you are in, leading you to protect the trees you use as anchors. It demands a sense of duty to the safety of yourself and others, compelling you to clear the area and use the proper signals. It calls for a deep respect for the equipment itself, motivating you to maintain it with care. Ultimately, the electric winch is a powerful amplifier, not just of force, but of the operator's own character. In the hands of a rushed, ignorant, or careless individual, it is a hazard. In the hands of a knowledgeable, methodical, and responsible operator, it is a key that can unlock the path forward from the most difficult of situations. The journey from novice to expert is a journey of cultivating not just skill, but wisdom.
Tài liệu tham khảo
Jindiao Lifting. (2025, October 11). Expert 7-point checklist: Selecting the right high load capacity hoist in 2025. Retrieved from https://www.jindiaolifting.com/expert-7-point-checklist-selecting-the-right-high-load-capacity-hoist-in-2025/
Prolift. (2025, October 29). All about lifting chains: Types, grades, applications. Retrieved from
Toyo Industry. (2025, September 25). Buyer’s guide: 7 critical factors for choosing a 3/4 ton chain hoist in 2025. Retrieved from https://www.toyo-industry.com/buyers-guide-7-critical-factors-for-choosing-a-3-4-ton-chain-hoist-in-2025/
Ulide Hoist. (2025, September 25). A practical chain hoist load capacity guide: 5 critical mistakes to avoid in 2025. Retrieved from https://www.ulidehoist.com/a-practical-chain-hoist-load-capacity-guide-5-critical-mistakes-to-avoid-in-2025/
Weihua. (2025, June 24). Weihua chain hoist user manual. Retrieved from https://www.weihualargecrane.com/blog/weihua-chain-hoist-user-manual/
Zoho Hoist. (2025, August 28). The 5-step guide to mastering chain safe working load (SWL) in 2025. Retrieved from https://www.zohohoist.com/the-5-step-guide-to-mastering-chain-safe-working-load-swl-in-2025/
Zoho Hoist. (2025, August 28). The ultimate 2025 guide to chain working load & lifting safety. Retrieved from