Resumen
El proceso de instalación de un cabrestante eléctrico en un remolque de embarcación representa una mejora significativa de la eficacia operativa y la seguridad del usuario. Este documento proporciona una exploración meticulosa del procedimiento completo de instalación, destinado tanto a los aficionados a la náutica como a los técnicos profesionales. Comienza con un análisis fundamental de la selección del cabrestante adecuado, examinando parámetros críticos como el cálculo de la capacidad, la ciencia del material del cable y la compatibilidad del sistema eléctrico. Las secciones siguientes ofrecen una guía sistemática paso a paso que abarca la preparación del remolque, el montaje mecánico de la unidad y los intrincados detalles del cableado eléctrico, incluida la integración de solenoides y controles. Se hace hincapié en el cumplimiento de las mejores prácticas para garantizar una instalación mecánica y eléctrica segura. La guía detalla además el método correcto para enrollar la línea del cabrestante bajo tensión y concluye con protocolos de prueba exhaustivos y un programa de mantenimiento preventivo. El objetivo es dotar al lector de los conocimientos necesarios para realizar una instalación de cabrestante eléctrico segura, fiable y duradera, transformando así la experiencia de botadura y recuperación de embarcaciones.
Principales conclusiones
- Calcule la capacidad del cabrestante multiplicando el peso de la embarcación por 1,5 a 2,0 para obtener un margen de seguridad.
- Inspeccione minuciosamente el soporte del cabrestante del remolque para comprobar la integridad estructural antes de la instalación.
- Utilice herrajes de acero inoxidable de alta calidad o galvanizados para evitar la corrosión.
- Comprenda cómo instalar un cabrestante eléctrico en un remolque de barco siguiendo un plan de cableado preciso.
- Incluya siempre un disyuntor o fusible con capacidad nominal para el consumo máximo de amperios del cabrestante.
- Tense correctamente el cable del cabrestante durante el primer enrollado para evitar que se atasque posteriormente.
- Compruebe regularmente todas las funciones y mantenga las conexiones eléctricas para garantizar la fiabilidad.
Índice
- Comprender los principios básicos: Cabrestante vs. Polipasto
- Paso 1: Selección del cabrestante eléctrico adecuado para su embarcación
- Paso 2: Montaje de las herramientas y el equipo de seguridad esenciales
- Paso 3: Preparación del remolque para la instalación del cabrestante
- Paso 4: El proceso mecánico de montaje del cabrestante eléctrico
- Paso 5: Navegar por las complejidades del cableado eléctrico
- Paso 6: Integración de controles y sistemas remotos
- Paso 7: Enrollar el cable del cabrestante con la tensión adecuada
- Paso 8: Pruebas finales, ajustes y mantenimiento a largo plazo
- Preguntas más frecuentes (FAQ)
- Conclusión
- Referencias
Comprender los principios básicos: Cabrestante vs. Polipasto
Antes de embarcarnos en la tarea práctica de la instalación, es necesaria una distinción conceptual para fundamentar nuestra comprensión de los equipos. El mundo de la manipulación de materiales está poblado de dispositivos que parecen similares pero que sirven para fines fundamentalmente diferentes. La falta de comprensión de estas distinciones puede conducir no sólo a un funcionamiento ineficaz, sino también a importantes riesgos para la seguridad. Los términos "cabrestante" y "polipasto" suelen utilizarse indistintamente en conversaciones informales, pero en ingeniería y aplicaciones describen herramientas con diseños y funciones distintos.
Las distintas funciones de la tracción y la elevación
La principal diferencia funcional radica en la dirección de la fuerza y en los sistemas de frenado empleados. Un cabrestante es fundamentalmente un dispositivo de tracción. Está diseñado para arrastrar una carga a través de una superficie relativamente horizontal, superando fuerzas como la fricción y la gravedad en una pendiente. Piense en su función en un remolque de embarcaciones: tira de la embarcación para subir por las literas o rodillos inclinados. Los sistemas de engranaje y frenado de la mayoría de los cabrestantes están diseñados para sostener una carga, pero no para suspender una carga por encima de la cabeza.
Por el contrario, un polipasto es un dispositivo de elevación. Está diseñado específicamente para elevar y bajar una carga verticalmente. Equipos como el polipastos eléctricos de cadena descritos por los fabricantes se construyen con sistemas de frenado especializados, a menudo un freno de carga mecánico, que se activa automáticamente si se pierde potencia (Konecranes, 2025). Esta característica es primordial para la seguridad cuando una carga está suspendida por encima de personas o bienes valiosos. Utilizar un cabrestante estándar para una aplicación de elevación vertical es un mal uso excepcionalmente peligroso del equipo, ya que su sistema de frenado dinámico no está diseñado para suspender una carga de forma segura.
Por qué el cabrestante es el mejor amigo del remolque
El diseño de un cabrestante para remolque de embarcaciones está perfectamente adaptado a su tarea. La fuerza necesaria para subir una embarcación a un remolque depende principalmente del peso de la embarcación, el ángulo de la rampa de botadura y la fricción de las literas o rodillos del remolque. La relación de transmisión del cabrestante proporciona la ventaja mecánica necesaria para que esta tarea sea manejable, y el motor eléctrico elimina el esfuerzo físico. Todo el sistema, desde las características de par del motor hasta la resistencia a la tracción del cable, está optimizado para esta dinámica de tracción horizontal o inclinada. Es una herramienta especializada, y su especialización es la fuente de su eficacia y seguridad en el contexto al que está destinada.
Análisis de las especificaciones del cabrestante según sus necesidades
Cuando empiece a examinar posibles cabrestantes, encontrará una hoja de especificaciones. Entender estas cifras es el primer paso para tomar una decisión informada. La "línea de tracción nominal" es la cifra principal, que representa la carga máxima que el cabrestante puede tirar con una sola capa de cable en el tambor. A medida que se enrolla más cable en el tambor, aumenta el diámetro efectivo y disminuye la fuerza de tracción. La "velocidad de la línea" indica la rapidez con la que el cabrestante puede recoger el cable, y suele indicarse tanto en vacío como a plena carga. La "relación de transmisión" indica la ventaja mecánica; una relación más alta significa más fuerza de tracción pero una velocidad de línea más lenta. Por último, el "consumo de amperaje del motor" es una especificación eléctrica crítica que dictará sus opciones de cableado, que exploraremos en detalle más adelante.
Paso 1: Selección del cabrestante eléctrico adecuado para su embarcación
La elección del cabrestante es quizá la decisión más importante de todo el proceso. Un cabrestante de tamaño insuficiente se resistirá, se sobrecalentará y fallará prematuramente, dejándole en una situación difícil en la rampa para embarcaciones. Un cabrestante sobredimensionado, aunque no sea funcionalmente problemático, representa un gasto innecesario y añade un exceso de peso a la lengüeta del remolque. El objetivo es encontrar el "punto óptimo": un cabrestante que maneje la embarcación con facilidad, posea un margen de seguridad cómodo y se adapte al sistema eléctrico del remolque. Esta decisión requiere un análisis minucioso de la capacidad, los materiales y la potencia.
Cálculo de la capacidad necesaria del cabrestante
La capacidad de un cabrestante se clasifica como su "capacidad de tracción de una sola línea". Esta cifra no coincide con el peso de la embarcación. Debe tener en cuenta las fuerzas adicionales que intervienen en el movimiento de un objeto inclinado contra la fricción. Una regla empírica fiable proporciona un punto de partida sólido para este cálculo.
En primer lugar, determine el peso total de su embarcación. Este es el "peso húmedo", que incluye el casco, el motor, el combustible, el agua y todo el equipo que suele llevar a bordo cuando lo recupera. No utilice el "peso en seco" del fabricante, ya que es una representación poco realista de la carga que soportará realmente el cabrestante.
Una vez que se tiene el peso total, hay que calcular el "peso de arrastre". No se trata de una simple correlación uno a uno. Una fórmula conservadora y ampliamente aceptada consiste en multiplicar el peso total de la embarcación por un factor que tenga en cuenta la fricción y la inclinación.
Tabla de cálculo de la capacidad del cabrestante
| Componente | Descripción | Paso de cálculo |
|---|---|---|
| Peso del barco (W) | Peso de la embarcación a plena carga (motor, combustible, equipo). | Ejemplo: 5.000 libras |
| Factor de fricción (F) | Para remolques con ruedas, utilice 1,5. Para remolques con literas, utilice 2,0. | Ejemplo (Litera): 2.0 |
| Capacidad necesaria | La capacidad mínima necesaria del cabrestante. | W x F = Capacidad |
| Resultado | 5,000 lbs x 2.0 = 10,000 lbs |
Siguiendo esta lógica, una embarcación con un peso húmedo de 5.000 libras en un remolque tipo litera necesitaría un cabrestante con una capacidad mínima de 10.000 libras. Los remolques con literas crean mucha más fricción que los remolques de rodillos, por lo que requieren un cabrestante más potente. Elegir un cabrestante que supere ligeramente este mínimo calculado proporciona un valioso margen de seguridad, garantizando que el motor funcione sin tensiones y prolongando su vida útil.
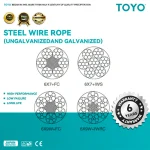
Comparación de tipos de cable: Acero frente a cable sintético
El cable que tira es tan importante como el motor que lo acciona. La elección entre el cable de acero galvanizado tradicional y el moderno cable sintético implica concesiones en cuanto a durabilidad, manejo y seguridad.
Comparación entre cable de acero y cuerda sintética
| Característica | Cable de acero galvanizado | Cuerda sintética |
|---|---|---|
| Durabilidad | Gran resistencia a la abrasión y al roce. | Susceptible a la degradación UV y a la abrasión. |
| Peso | Pesado, añadiendo peso a la lengüeta. | Extremadamente ligero y fácil de manejar. |
| Manejo de | Puede desarrollar rebabas afiladas ("anzuelos"). Requiere guantes. | Suave y flexible. No forma rebabas. |
| Seguridad | Almacena una inmensa energía cinética. Puede azotar violentamente si se rompe. | Almacena muy poca energía cinética. Tiende a caer al suelo si falla. |
| Mantenimiento | Propenso a oxidarse si la galvanización se ve comprometida. Requiere lubricación. | Debe mantenerse limpio. Puede congelarse si está mojado. |
| Coste | Suele ser menos costoso por adelantado. | Suele ser más caro que el acero. |
Para la mayoría de los navegantes de recreo, las ventajas de seguridad y manejo de la cuerda sintética la convierten en la mejor opción, a pesar de su mayor coste y de la necesidad de protección contra el roce. Es más ligero, más fácil de manejar y mucho más seguro en el improbable caso de que se produzca un fallo. El cable de acero sigue siendo una opción viable para los usuarios en entornos muy abrasivos, donde su resistencia es un activo primordial.
Evaluación de opciones de fuentes de alimentación: Sistemas de 12 V CC
Los cabrestantes para remolques de barcos están diseñados para funcionar con un sistema de corriente continua (CC) de 12 voltios, el mismo sistema que se encuentra en su vehículo remolcador. La cuestión no es qué tipo de corriente utilizar, sino cómo suministrarla de forma fiable. El motor del cabrestante consume una cantidad significativa de corriente bajo carga, a menudo más de 100 amperios. Esta elevada demanda requiere una fuente de alimentación robusta y un cableado del tamaño adecuado.
La fuente de alimentación más común y recomendada es la batería del vehículo de remolque. Esto garantiza una fuente potente y recién cargada. Sin embargo, esto requiere tender cables de gran calibre desde la batería del vehículo hasta el conector del remolque. Una alternativa menos común es montar una batería marina de ciclo profundo en una caja en la lengüeta del remolque. Esto simplifica el cableado en el lado del vehículo pero añade otra batería que mantener e introduce otro punto potencial de fallo si no se mantiene cargada. Para la mayoría de las aplicaciones, la solución más fiable es conectar el cabrestante a la batería del vehículo tractor.
Impermeabilización y resistencia a la corrosión
El remolque de una embarcación vive en un entorno hostil. Se sumerge repetidamente en el agua, a veces salada, y se expone a los elementos. El cabrestante que elija debe estar fabricado para soportar este maltrato. Busque modelos con clasificación IP (Ingress Protection), que cuantifica su resistencia al polvo y al agua. Una clasificación IP67, por ejemplo, indica que la unidad es estanca al polvo y puede sumergirse hasta un metro de agua.
Los materiales y revestimientos son igualmente importantes. Busque herrajes de acero inoxidable, carcasas de motor con recubrimiento de polvo o pintadas para uso marino y componentes eléctricos sellados. El solenoide, o contactor, que es el relé de alta corriente que controla el motor, debe estar totalmente sellado para proteger sus sensibles piezas internas de la humedad y la corrosión. Invertir en un cabrestante bien sellado y resistente a la corrosión reportará dividendos en fiabilidad y longevidad.
Paso 2: Montaje de las herramientas y el equipo de seguridad esenciales
El éxito de una instalación depende tanto de la preparación como de la ejecución. Llegar al proyecto con todas las herramientas necesarias y el equipo de seguridad preparado transforma la experiencia de una de frustrantes interrupciones a una de progreso metódico y sin contratiempos. El proceso implica tanto trabajo mecánico pesado como trabajo eléctrico preciso, por lo que el conjunto de herramientas necesarias es variado.
El juego de herramientas del mecánico: Llaves, vasos y taladros
El núcleo de la instalación mecánica gira en torno a desatornillar el cabrestante antiguo y fijar firmemente el nuevo.
- Juego de vasos y llaves: Necesitarás un juego completo de llaves de vaso métricas e imperiales y llaves combinadas. Los tornillos de montaje de los cabestrantes pueden ser grandes, así que asegúrate de que tu juego llega al menos hasta 19 mm (o 3/4 de pulgada). Una llave de tubo con alargador será muy útil para llegar a las tuercas en lugares estrechos.
- Llave dinamométrica: Esta es una herramienta no negociable para este trabajo. Los pernos de montaje del cabrestante deben apretarse a un valor de par específico, proporcionado por el fabricante del cabrestante. Un apriete excesivo puede dañar la carcasa del cabrestante o estirar los pernos, mientras que un apriete insuficiente puede hacer que el cabrestante se desplace bajo carga. Una llave dinamométrica de tipo clic es lo suficientemente asequible y precisa para esta tarea.
- Taladro eléctrico para trabajos pesados: Es posible que tenga que taladrar nuevos orificios de montaje en el soporte del cabrestante o ampliar los existentes. Se necesita un potente taladro con cable o inalámbrico de alto voltaje para penetrar en el grueso acero del bastidor del remolque.
- Brocas de alta calidad: Utilice brocas afiladas de acero rápido (HSS) o cobalto diseñadas para metal. Tenga a mano varios tamaños correspondientes a sus nuevos herrajes de montaje. El uso de un líquido o aceite de corte durante el taladrado facilitará el proceso y prolongará la vida útil de las brocas.
- Palanca y martillo: Pueden ser útiles para persuadir a un viejo cabrestante testarudo de que se suelte de su soporte, especialmente si hay algo de corrosión.
Esenciales eléctricos: Crimpadoras, peladoras y multímetros
La parte eléctrica de la instalación exige precisión. Las conexiones deficientes son la principal causa de avería de los cabrestantes eléctricos.
- Pelacables de gran calibre: Los cables de alimentación de un cabrestante son gruesos (normalmente de calibre 4 ó 2). Los pelacables estándar no funcionan. Necesita una herramienta diseñada específicamente para cortar y pelar limpiamente estos cables de gran diámetro.
- Crimpadora hidráulica o de martillo: Es fundamental crear una conexión segura entre el cable y los terminales. Una pequeña crimpadora tipo alicate es inadecuada para esta tarea. Necesita una herramienta de alta compresión. Una crimpadora hidráulica es la elección de los profesionales, ya que proporciona un crimpado perfecto y de alta conductividad en todo momento. Una opción más económica es una crimpadora de martillo, que se golpea con un martillo para formar el engarce.
- Multímetro digital: Esta es su herramienta de diagnóstico. La utilizará para confirmar que tiene alimentación de 12 V donde espera, para comprobar la continuidad del cableado y para solucionar cualquier problema que surja. Es una herramienta indispensable para cualquier trabajo eléctrico.
- Pistola térmica y tubo termorretráctil: Todas las conexiones eléctricas, especialmente los terminales engarzados, deben sellarse contra la humedad. Los tubos termorretráctiles con adhesivo ofrecen la mejor protección. Una pistola de calor permite retraer el tubo uniformemente para conseguir un sellado profesional y hermético.
Priorizar los equipos de protección individual (EPI)
Su seguridad personal es más importante que cualquier parte de este proyecto. Las fuerzas y energías implicadas exigen respeto.
- Gafas de seguridad: Las virutas metálicas del taladrado, el óxido que sale despedido y los posibles arcos eléctricos hacen que la protección ocular sea obligatoria de principio a fin.
- Guantes de trabajo resistentes: Proteja sus manos de los bordes metálicos afilados, las superficies calientes y los inevitables rasguños y magulladuras. Al manipular cables de acero para cabrestantes, es esencial utilizar guantes gruesos de cuero para protegerse de los filos rotos.
- Protección auditiva: El uso de un taladro eléctrico en una estructura de acero puede ser extremadamente ruidoso. Protéjase el oído, sobre todo si taladra durante mucho tiempo.
- Calzado estable: Trabajará cerca de un remolque pesado. Se recomienda llevar botas con puntera de acero para protegerse de las lesiones por aplastamiento.
Tener estos elementos listos antes de empezar demuestra un enfoque profesional y un compromiso con una instalación segura y de alta calidad.
Paso 3: Preparación del remolque para la instalación del cabrestante
Una vez seleccionado el cabrestante correcto y con las herramientas adecuadas a mano, la atención se centra ahora en el propio remolque. El cabrestante es tan fuerte como la estructura en la que está montado. Un nuevo y potente cabrestante montado sobre un soporte débil y corroído es una receta para un fallo catastrófico. Esta fase preparatoria consiste en garantizar una base sólida para las potentes fuerzas que ejercerá el cabrestante.
Inspección minuciosa del soporte del cabrestante
El soporte del cabrestante, o poste del cabrestante, es el miembro vertical situado en la parte delantera del remolque que sujeta el cabrestante y el rodillo de proa. Antes de retirar el cabrestante antiguo, realice una inspección rigurosa de todo este conjunto.
Empiece con una comprobación visual. Busque cualquier signo de agrietamiento, especialmente alrededor de las soldaduras donde el poste se une al bastidor del remolque y donde la placa de montaje del cabrestante está soldada al poste. Las grietas son una señal de alarma inmediata y deben ser reparadas profesionalmente por un soldador certificado antes de continuar.
A continuación, compruebe si hay corrosión. Golpee toda la superficie del soporte del cabrestante con un martillo. Lo que se busca son cambios en el sonido. Un "ping" fuerte indica metal en buen estado, mientras que un "ruido sordo" puede indicar óxido interno o acero debilitado. Utilice un destornillador o un cepillo de alambre para raspar cualquier burbuja de pintura u óxido superficial. Debe determinar si el óxido es meramente cosmético o si ha comprometido la integridad estructural del metal. Si puede hacer un agujero en el metal con un destornillador, el soporte no es seguro y debe ser sustituido. Compruebe los tornillos que sujetan el caballete al bastidor del remolque; no deben presentar óxido significativo y deben estar bien apretados.
Desmontaje del antiguo cabrestante manual
El proceso de desmontaje de la unidad antigua suele ser sencillo. La mayoría de los cabrestantes manuales se sujetan con dos o cuatro pernos.
En primer lugar, desenrolle completamente la correa o el cable viejo del tambor del cabrestante. Tenga cuidado, ya que la correa puede estar degradada y el gancho puede estar bajo tensión. Una vez que la línea esté libre, podrá acceder a los pernos de montaje. Estos pernos suelen estar oxidados. Aplique una cantidad generosa de aceite penetrante (como PB Blaster o Kroil) a las tuercas y pernos y déjelo reposar durante al menos 15-20 minutos. Esto hará que el desmontaje sea mucho más fácil.
Afloje las tuercas con cuidado utilizando la llave y el vaso del tamaño adecuado. Es posible que tenga que utilizar una llave en la cabeza del tornillo para evitar que gire. Si las tuercas están completamente agarrotadas, puede que tenga que recurrir a un divisor de tuercas o cortarlas cuidadosamente con una amoladora angular, teniendo cuidado de no dañar el propio soporte del cabrestante. Una vez retirados los tornillos, el antiguo cabrestante debería levantarse de la placa de montaje. Puede que sea necesario persuadirlo suavemente con un mazo de goma o una palanca si ha estado colocado durante muchos años.
Limpieza y preparación de la superficie de montaje
Una vez que el viejo cabrestante está fuera del camino, usted se queda con la placa de montaje desnuda. Esta superficie debe estar perfectamente limpia, plana y protegida antes de instalar el nuevo cabrestante.
Utiliza un cepillo de alambre -de mano o con una rueda de alambre en el taladro- para eliminar todo el óxido, la pintura vieja y los restos de la superficie de montaje. El objetivo es dejar el metal limpio. Una superficie limpia garantiza que el nuevo cabrestante quede perfectamente plano, lo que es fundamental para distribuir uniformemente la fuerza de tracción y evitar fracturas por tensión en la carcasa del cabrestante.
Tras la limpieza, limpie la superficie con un desengrasante o alcohol desnaturalizado para eliminar cualquier resto de aceite. Inspeccione de nuevo la superficie en busca de cualquier deformación o daño que pudiera haber quedado oculto por el antiguo cabrestante.
Antes de montar el nuevo cabrestante, debe proteger este metal desnudo de la corrosión futura. Aplique dos o tres capas finas de imprimación a base de zinc de alta calidad o una pintura antioxidante directa al metal. Esta capa protectora es su mejor defensa contra el duro entorno marino. Deje que la pintura se cure por completo siguiendo las instrucciones del fabricante antes de pasar al siguiente paso. Apresurarse en esta etapa sólo creará problemas en el futuro.
Paso 4: El proceso mecánico de montaje del cabrestante eléctrico
En esta fase, el nuevo cabrestante se integra físicamente en el remolque. El objetivo es crear una conexión perfectamente alineada e inmensamente resistente, capaz de soportar los miles de kilos de fuerza a los que estará sometido. La precisión y el uso de herrajes de alta calidad no son opcionales; son requisitos fundamentales para una instalación segura y duradera.
Alineación del cabrestante con el ojo de proa
Una alineación correcta es fundamental para el funcionamiento y la longevidad tanto del cabrestante como de su cable. El cable del cabrestante debe tirar en línea recta desde el centro del tambor del cabrestante hasta el ojo de proa de la embarcación. Una desalineación, aunque sea de unos pocos grados, hará que el cable se "amontone" en un lado del tambor durante la recogida. Este enrollado desigual puede dañar el cable, ejercer una enorme tensión sobre el armazón del cabrestante e incluso hacer que el cabrestante se atasque por completo.
Coloque el nuevo cabrestante eléctrico en la placa de montaje recién preparada. La mayoría de los cabrestantes vienen con una plantilla de montaje, que es una guía de papel que muestra la ubicación exacta de los orificios de los tornillos. Si se suministra una plantilla, utilícela. Si no, utilice el propio cabrestante como plantilla.
Coloque el cabrestante de modo que el centro del tambor esté perfectamente alineado con la roldana de proa y, por extensión, con el ojo de proa de su embarcación. Puede utilizar una regla o un cordel que vaya desde la roldana de proa hacia atrás a lo largo de la línea central del remolque para visualizar y confirmar la alineación. El cabrestante también debe estar nivelado. Utilice un pequeño nivel de burbuja para comprobarlo tanto de adelante hacia atrás como de lado a lado. Si la propia placa de montaje no está nivelada, es posible que tenga que utilizar calzos (las arandelas de acero inoxidable son una buena opción) para nivelar el cabrestante.
Taladrar agujeros de montaje: La precisión es primordial
Una vez que esté satisfecho con la alineación, es hora de marcar y taladrar los orificios de montaje. Si el patrón de pernos de su nuevo cabrestante coincide con los agujeros existentes en el soporte del cabrestante, usted es afortunado. Sin embargo, es más probable que usted tendrá que perforar nuevos agujeros.
Con un punzón y un martillo, haga una pequeña hendidura en el centro de cada orificio marcado. Esta pequeña hendidura evitará que la broca "camine" o se desvíe cuando empiece a taladrar, garantizando que el orificio esté exactamente donde desea.
Empiece taladrando un "orificio piloto" más pequeño, quizás de 1/8 de pulgada o 3/16 de pulgada de diámetro. Esto es mucho más fácil de controlar que una broca grande y establece la trayectoria para el orificio final. Una vez taladrados los agujeros piloto, cambie al tamaño de broca final que corresponda a sus pernos de montaje. Por ejemplo, para un perno de 3/8 de pulgada, se utilizaría una broca de 3/8 de pulgada.
Aplique una presión firme y constante y utilice una velocidad de perforación lenta. Deje que la broca haga el trabajo. La aplicación de líquido de corte durante este proceso enfriará la broca y el metal, lo que dará como resultado un orificio más limpio y preservará la vida útil de la broca. Taladre hasta el fondo de la placa de montaje. Después de taladrar, utilice una broca más grande o una herramienta de desbarbado para limpiar los bordes de los orificios en ambos lados. Cualquier rebaba afilada puede crear puntos de tensión.
Por último, es fundamental proteger de la oxidación el metal desnudo del interior de los orificios recién taladrados. Utilice un cepillo pequeño o un bastoncillo de algodón para aplicar la misma imprimación o pintura a base de zinc que utilizó en la superficie de montaje.
Fijación del cabrestante con herrajes de alta calidad
La tornillería -pernos, tuercas y arandelas- que sujeta el cabrestante al soporte es lo único que resiste las inmensas fuerzas de tracción. Utilizar tornillería de baja calidad es un error de seguridad crítico.
Utilice siempre la tornillería nueva de alta calidad que se suministra con el cabrestante. Si por alguna razón tiene que adquirirlos usted mismo, deben ser al menos de Grado 5, aunque es preferible que sean de Grado 8. Para uso marino, los herrajes de acero inoxidable (normalmente de tipo 316) son la mejor opción por su mayor resistencia a la corrosión.
La secuencia correcta de fijación es: cabeza del tornillo, arandela plana, soporte del cabrestante, soporte del remolque, arandela plana, arandela de seguridad y, por último, la tuerca. Las arandelas planas distribuyen la fuerza de apriete sobre un área más amplia, evitando que la cabeza del tornillo y la tuerca se claven en el metal. La arandela de seguridad impide que la tuerca se afloje debido a las vibraciones.
Introduzca los tornillos (normalmente de arriba abajo) y apriete las tuercas a mano. A continuación, con la llave dinamométrica, apriete cada tornillo siguiendo un patrón entrecruzado. Esto asegura una presión de apriete uniforme. Apriételos con el par de apriete específico indicado en el manual de instalación de su cabrestante. No adivine. La especificación del par de apriete es un cálculo de ingeniería diseñado para alcanzar la fuerza de apriete óptima sin dañar ningún componente. Una vez aplicado el par de apriete, el cabrestante estará montado de forma segura en el remolque.
Paso 5: Navegar por las complejidades del cableado eléctrico
El sistema eléctrico es el corazón de su nuevo cabrestante. Un cableado adecuado garantiza que el cabrestante reciba toda la potencia que necesita para funcionar correctamente y con seguridad. Un trabajo de cableado deficiente, caracterizado por cables de tamaño insuficiente, conexiones sueltas o falta de protección de circuitos, provocará un rendimiento deficiente, sobrecalentamiento y un riesgo significativo de incendio. Este proceso requiere un enfoque metódico y una comprensión clara de los principios eléctricos básicos.
Planificación de la ruta del cable de la batería al cabrestante
El objetivo es crear un camino para los cables de alimentación de gran calibre desde la batería del vehículo tractor hasta el cabrestante en la lengüeta del remolque. Este camino debe ser lo más corto posible para minimizar la caída de tensión, y debe estar protegido de daños físicos y del calor.
En el vehículo remolcador, deberá tender un cable positivo y otro negativo desde los terminales de la batería hasta el parachoques trasero. La ruta ideal es a lo largo del bastidor del vehículo, utilizando el mismo camino que el arnés de cableado de fábrica. Asegure los cables a la barra del bastidor cada 12-18 pulgadas utilizando bridas de alta calidad o abrazaderas P acolchadas. Mantenga los cables alejados de componentes de escape calientes, bordes afilados y cualquier pieza móvil de la suspensión.
Necesitarás una forma de desconectar la corriente cuando desenganches el remolque. La solución profesional es un enchufe de alto amperaje y desconexión rápida, similar a los utilizados en los cables de arranque de las grúas. Monte una mitad del enchufe en el parachoques trasero o en el bastidor del vehículo, y la otra mitad en el lado del remolque.
Instalación del solenoide o de la caja de control
El motor del cabrestante consume demasiada corriente para ser manejado por un simple interruptor. En su lugar, utiliza un solenoide (también llamado contactor), que es un relé electromagnético de alta resistencia. El pequeño interruptor del mando a distancia envía una señal de baja corriente al solenoide, que cierra un circuito de alta corriente para alimentar el motor.
La mayoría de los cabrestantes eléctricos modernos vienen con el solenoide alojado en una caja de control sellada. Esta caja debe montarse de forma segura. Algunos cabrestantes tienen la caja de control integrada en el propio cuerpo del cabrestante. Otros tienen una caja separada que debe montarse cerca, a menudo en el cuerpo o en el poste del cabrestante. Siga las instrucciones del fabricante para montar la caja de control. Asegúrese de que está en un lugar protegido de impactos físicos pero accesible.
Conectará los cables cortos de gran calibre de la caja de control a los terminales correspondientes del motor del cabrestante. Normalmente están codificados por colores o etiquetados. Asegúrese de que estas conexiones estén limpias y apretadas. Una conexión floja aquí generará un calor inmenso y causará una caída de tensión, privando al motor de potencia.
Conexión a la batería: El papel de los disyuntores
Este es el paso más crítico para la seguridad eléctrica. Debe instalar un dispositivo de protección de circuitos en el cable de alimentación positivo principal, lo más cerca posible del terminal positivo de la batería. Esto no es opcional. Este dispositivo, ya sea un disyuntor o un fusible de gran tamaño, está diseñado para interrumpir el circuito en caso de cortocircuito, evitando un incendio catastrófico.
La capacidad del disyuntor o fusible debe corresponderse con la del cabrestante. En el manual del cabrestante se especifica el amperaje máximo. Seleccione un disyuntor ligeramente superior a este consumo máximo. Por ejemplo, si el cabrestante puede consumir hasta 350 amperios, lo adecuado sería un disyuntor de 400 amperios.
Conecte el cable positivo del borne positivo de la batería a un borne del disyuntor. Conecte el cable largo que va a la parte trasera del vehículo al otro borne del disyuntor. Monte el disyuntor firmemente en la carrocería del vehículo o en el cortafuegos, cerca de la batería.
Conecte el cable negativo principal directamente al borne negativo de la batería. No confíe en el chasis del vehículo para la conexión a tierra. Un cable negativo dedicado a la batería garantiza una vía de retorno limpia y fiable para la alta corriente.
Asegurar y proteger el mazo de cables
Una vez realizadas todas las conexiones, el último paso es proteger el cableado. En cualquier lugar donde los cables pasen a través de un agujero en la carrocería o el bastidor del vehículo, debe instalar un pasacables de goma para evitar que el borde metálico afilado roce el aislamiento del cable.
Cubra toda la longitud de los cables principales de alimentación con un mazo de cables o conducto protector. Este tubo de plástico dividido añade una capa esencial de protección contra la abrasión y los impactos. Sujete bien todo el mazo de cables con bridas de cremallera, asegurándose de que no queden secciones sueltas o colgando que puedan engancharse. Un trabajo de cableado ordenado y bien protegido es el sello distintivo de una instalación profesional. No sólo tiene mejor aspecto, sino que también es mucho más seguro y fiable.
Paso 6: Integración de controles y sistemas remotos
Una vez completado el trabajo pesado de montaje y cableado, la atención se centra en la interfaz de usuario: los controles que permiten manejar el cabrestante. Los cabrestantes modernos permiten elegir entre un mando a distancia tradicional con cable y un sistema inalámbrico más cómodo. La instalación de estos controles es relativamente sencilla, pero la colocación y configuración adecuadas son fundamentales para una buena experiencia de usuario.
Mandos a distancia fijos o inalámbricos
La elección entre un mando con cable o inalámbrico suele depender de las preferencias personales y del presupuesto.
- Mando a distancia con cable: Este tipo de mando dispone de un cable que se conecta a una toma de la caja de control del cabrestante. Sus ventajas son la fiabilidad y la sencillez. No hay pilas que se agoten ni señales inalámbricas que interfieran. La principal desventaja es que está atado al cabrestante por la longitud del cable, lo que a veces puede ser un inconveniente cuando necesitas estar en una posición específica para controlar la alineación de la embarcación.
- Mando a distancia inalámbrico: Un sistema inalámbrico ofrece la máxima libertad. Le permite manejar el cabrestante desde cualquier lugar dentro de su alcance: desde el asiento del conductor del vehículo de remolque, desde el interior de la embarcación o desde un punto de observación en el muelle. Esto puede facilitar enormemente las tareas de botadura y recogida con una sola mano. Los inconvenientes potenciales son la dependencia de las pilas del mando a distancia y la posibilidad, por pequeña que sea, de interferencias de radiofrecuencia.
Mucha calidad cabrestante eléctrico incluyen ahora ambas opciones, lo que le ofrece lo mejor de los dos mundos: la comodidad del mando inalámbrico para el uso diario y la fiabilidad del mando con cable como reserva.
Montaje del interruptor de control para facilitar el acceso
Si su sistema incluye un mando a distancia cableado, tendrá que montar su toma. Esta toma suele ser un conector robusto y resistente a la intemperie situado en la caja de control. Su principal tarea es asegurarse de que la caja de control esté montada en un lugar que permita enchufar y desenchufar el mando a distancia con facilidad y comodidad. No querrás tener que andar a tientas en un lugar de difícil acceso en una rampa de embarcaciones muy concurrida.
Algunos usuarios optan por instalar un interruptor adicional "en cabina". Esto implica pasar cables de menor calibre desde la caja de control a la cabina del vehículo remolcador hasta un interruptor basculante montado en el salpicadero. Esto puede ser una característica conveniente, pero añade complejidad al cableado y es un proyecto emprendido mejor por ésos con experiencia en trabajo eléctrico automotor. Para la mayoría, los mandos a distancia suministrados son más que suficientes.
Emparejar y probar el mando a distancia inalámbrico
Si su cabrestante viene con un mando a distancia inalámbrico, deberá emparejarlo con el receptor de la caja de control. El proceso de emparejamiento suele ser muy sencillo y está diseñado para garantizar que el mando a distancia sólo accione el cabrestante y no otro que se encuentre cerca.
El procedimiento suele implicar una secuencia de pulsaciones de botones en el mando a distancia mientras se conecta la alimentación principal del cabrestante. Por ejemplo, puede que tengas que mantener pulsados los botones "in" y "out" del mando a distancia simultáneamente mientras conectas la alimentación principal. La caja de control suele tener un indicador luminoso o un pitido para confirmar que el emparejamiento se ha realizado correctamente.
Consulte en el manual de su cabrestante'el procedimiento de emparejamiento específico para su modelo. Es un paso fundamental que debe realizar y probar antes de dirigirse a la rampa para embarcaciones. Pruebe el funcionamiento del mando a distancia inalámbrico desde varias distancias y ángulos para conocer su alcance efectivo. Recuerde guardar una pila de repuesto para el mando en la guantera de su vehículo.
Paso 7: Enrollar el cable del cabrestante con la tensión adecuada
Los principiantes suelen pasar por alto este paso, pero es absolutamente fundamental para la salud y el rendimiento a largo plazo del cabrestante. Si enrolla el cable en el tambor por primera vez sin tensión, quedará suelto y desordenado. Cuando más tarde someta el cabrestante a una carga pesada, este cable suelto intentará encajarse en las capas inferiores. Esto puede pellizcar, aplastar y dañar gravemente el cable, ya sea de acero o sintético. Un enrollado correcto y tensado crea una base firme y sólida que evitará que esto ocurra.
La importancia de una técnica de bobinado adecuada
El objetivo es enrollar toda la longitud del cable en el tambor en capas ordenadas y uniformes, bajo una carga lo suficientemente importante como para eliminar toda la holgura de la línea. Esto requiere un entorno controlado y seguro. La carga ideal es de aproximadamente 500-1.000 libras de resistencia a la rodadura.
No intente crear esta tensión a mano. No puede tirar con la fuerza suficiente para crear la tensión necesaria, y no es seguro. Debe utilizar el peso de su embarcación o de su vehículo para lograrlo correctamente.
Aplicar tensión para una envoltura firme y uniforme
El método más seguro y eficaz consiste en utilizar la embarcación en una pendiente muy ligera y pavimentada, como un camino de entrada con pendiente suave o un aparcamiento vacío.
- Prepare la zona: Busca un lugar adecuado y seguro con mucho espacio abierto. Calce bien las ruedas del remolque para que no pueda moverse.
- Conecte el cable: Desenrolle del tambor del cabrestante todas las vueltas de cable excepto las últimas 5-10. Fije el gancho del cabrestante a la argolla de proa de su embarcación.
- Crear la carga: Con el barco en el remolque, busque una ligera pendiente. Deje que la embarcación ruede suavemente hacia atrás contra el calzo del remolque, tensando el cable del cabrestante. También puede anclar el remolque a un objeto fijo (como un árbol grande con un protector de tronco) y utilizar el vehículo para crear tensión. Este segundo método es más común para cabrestantes de vehículos todoterreno, pero también funciona aquí. La clave es crear un tirón constante y moderado en el cable.
- Enrolle el cable: Una vez establecida la tensión, utilice la función "power in" del cabrestante para enrollar el cable en el tambor de forma lenta y constante.
- Guía el cable: A medida que entra el cable, hay que guiarlo para que forme envolturas ordenadas, apretadas y adyacentes en toda la anchura del tambor. Haga que una persona maneje el mando a distancia mientras otra, situada a una distancia segura a un lado, ayuda a guiar el cable. Para el cable sintético, puede guiarlo con la mano (utilizando guantes). Para el cable de acero, nunca lo toques directamente; utiliza un trozo de madera o una herramienta especializada para guiarlo y evitar lesiones por rotura de cables.
- Construye capas uniformes: Continúe enrollando el cable, formando una capa ordenada sobre otra hasta que toda la línea esté enrollada en el tambor.
Este proceso garantiza que la cuerda quede bien apretada, proporcionando una base sólida que no permitirá que las capas exteriores se claven y causen daños cuando utilice el cabrestante para recuperar su embarcación en la rampa.
Fijación del gancho y del cierre de seguridad
El último componente es el gancho. Si no estaba preinstalado, tendrá que fijarlo ahora. La mayoría de los cables sintéticos utilizan un ojal empalmado, y los cables de acero utilizan un guardacabos sujeto por una grapa o abrazaderas. El gancho se fija a este ojo. Asegúrese de que el gancho que utiliza está clasificado para la capacidad del cabrestante.
Inspeccione el pestillo de seguridad del gancho. Este pequeño pestillo accionado por resorte es lo que impide que el gancho se salga accidentalmente del ojo de proa de la embarcación. Debe funcionar suavemente y cerrarse por completo. Si el pestillo está doblado, débil o falta, sustituya todo el gancho. Es una pieza pequeña pero vital del equipo de seguridad.
Paso 8: Pruebas finales, ajustes y mantenimiento a largo plazo
La instalación está completa, pero el trabajo no ha terminado. La fase final implica una serie de pruebas para verificar que todo funciona correctamente, seguidas del establecimiento de un programa de mantenimiento rutinario para garantizar que el cabrestante proporcione años de servicio fiable. Saltarse este proceso de verificación y mantenimiento es invitar al fallo en el momento más inoportuno.
Realización de una prueba de funcionamiento sin carga
Antes de someter el cabrestante a todo el peso de su embarcación, debe realizar una sencilla comprobación de funcionamiento sin carga.
Vuelva a conectar la alimentación principal al sistema del cabrestante. Utilice el mando a distancia (pruebe tanto el cableado como el inalámbrico, si dispone de ellos) para accionar el cabrestante en ambas direcciones. Desconecte el cable unos 3 metros y vuelva a conectarlo.
Durante esta prueba, usted escucha y observa. Preste atención a cualquier ruido inusual del motor o la caja de engranajes, como chirridos o atascos. El cabrestante debe funcionar de forma suave y relativamente silenciosa. Observe el tambor para asegurarse de que gira libremente y de que el cable se enrolla y desenrolla sin engancharse. Compruebe todas las funciones del mando a distancia. Esta sencilla comprobación puede identificar cualquier problema inmediato con las conexiones eléctricas o el funcionamiento mecánico del cabrestante antes de ponerlo bajo tensión.
Realización de una prueba de carga con el barco
La verdadera prueba de su instalación consiste en utilizarla según lo previsto. El mejor lugar para hacerlo es una rampa de embarcaciones tranquila y fuera de horas punta. Así podrá trabajar despacio y con cuidado, sin presiones.
Bote su embarcación como lo haría normalmente. A continuación, inicie el proceso de recuperación utilizando su nuevo cabrestante eléctrico. Cuando el cabrestante empiece a tirar de la embarcación para subirla al remolque, preste mucha atención.
- Controla el motor: El motor del cabrestante trabajará duro, pero no debe sonar como si estuviera esforzándose excesivamente o luchando.
- Comprueba la velocidad: La velocidad de la línea será más lenta bajo carga que durante la prueba en vacío. Esto es normal. Sin embargo, si parece excesivamente lenta o si el motor suena como si estuviera a punto de calarse, deténgase inmediatamente. Esto podría indicar un cabrestante de tamaño insuficiente o una mala conexión eléctrica que causa una caída de tensión.
- Observe el enrollamiento del cable: Observe cómo se enrolla el cable en el tambor. Gracias a su trabajo de pretensado, debería enrollarse en capas relativamente ordenadas y uniformes.
- Compruebe si hay sobrecalentamiento: Una vez que la embarcación esté completamente cargada en el remolque, palpe con cuidado la carcasa del motor del cabrestante y los cables principales de alimentación cerca de las conexiones. Estarán calientes al tacto, lo cual es normal. Sin embargo, si están demasiado calientes para mantener cómodamente la mano sobre ellos, es señal de un problema. El calor excesivo indica que el motor está sobrecargado o, más probablemente, que hay una conexión eléctrica de alta resistencia que debe limpiarse y apretarse.
Establecer un programa de mantenimiento a largo plazo
Un cabrestante eléctrico es una herramienta potente, no un accesorio que "se instala y se olvida". La inspección y el mantenimiento periódicos son esenciales para la seguridad y la longevidad.
Lista de comprobación del mantenimiento del cabrestante
| Frecuencia | Tarea | Descripción |
|---|---|---|
| Antes de cada uso | Inspección visual | Compruebe brevemente que el cable del cabrestante no presenta daños visibles (deshilachado, dobleces), asegúrese de que el gancho y el pestillo de seguridad funcionan y compruebe que el mando a distancia funciona. |
| Mensualmente | Comprobación eléctrica | Inspeccione todas las conexiones eléctricas en busca de estanqueidad y signos de corrosión. Limpie los terminales con un cepillo de alambre si es necesario y aplique grasa dieléctrica o inhibidor de corrosión. |
| Mensualmente | Comprobación mecánica | Compruebe el par de apriete de los pernos de montaje del cabrestante para asegurarse de que no se han aflojado con las vibraciones. Inspeccione el soporte del cabrestante en busca de nuevos signos de grietas u óxido. |
| Anualmente | Mantenimiento de cables | Desenrolle todo el cable, inspecciónelo minuciosamente en busca de daños y límpielo. Si se trata de cable de acero, lubríquelo ligeramente con un lubricante para cables de cabrestante específico. Si se trata de cable sintético, lávelo con agua y jabón suave para eliminar la arenilla incrustada. |
| Anualmente | Prueba del sistema completo | Realice una prueba a plena carga, prestando atención al sonido y al calor del motor, para asegurarse de que el sistema sigue funcionando al máximo rendimiento. |
Siguiendo un sencillo programa de mantenimiento, podrá identificar y solucionar los pequeños problemas antes de que se conviertan en grandes, asegurándose de que su cabrestante eléctrico esté siempre listo para funcionar cuando más lo necesite.
Preguntas más frecuentes (FAQ)
-
¿Cuál es la mejor fuente de alimentación para un cabrestante de remolque de barco? La fuente de alimentación ideal es la batería de arranque del vehículo remolcador. Proporciona un amplio amperaje, se recarga constantemente con el alternador del vehículo y evita la necesidad de una batería independiente en el remolque, que requiere su propio mantenimiento y régimen de carga.
-
¿Cómo puedo determinar la capacidad de cabrestante adecuada para mi embarcación? Calcule el "peso húmedo" de la embarcación a plena carga (incluido el motor, el combustible, el agua y todo el equipo). Para un remolque con ruedas, multiplique este peso por 1,5. Para un remolque con literas alfombradas, que crean más fricción, multiplique el peso por 2,0. Este resultado es el cabrestante mínimo necesario. Este resultado es la capacidad mínima requerida del cabrestante.
-
¿Es la cuerda sintética mejor opción que el cable de acero para uso marino? Para la mayoría de los navegantes de recreo, sí. La cuerda sintética es mucho más ligera, fácil de manejar y mucho más segura en caso de rotura, ya que no almacena energía cinética como el acero. Aunque requiere más cuidado para protegerlo de la abrasión, sus ventajas en seguridad y facilidad de uso son sustanciales.
-
¿Cuál es la forma más eficaz de evitar la corrosión en las conexiones eléctricas? Después de asegurarse de que todas las conexiones son mecánicamente estancas, el mejor método es sellarlas para protegerlas de la humedad. Utilice tubos termorretráctiles forrados de adhesivo sobre los terminales engarzados. En el caso de los bornes de la batería y los postes de conexión, límpielos a fondo y aplique una capa generosa de grasa dieléctrica o un aerosol anticorrosión marino especializado.
-
¿Qué debo hacer si el motor del cabrestante parece sobrecalentarse durante la recogida? Detenga el cabrestante inmediatamente. El sobrecalentamiento es un signo de carga excesiva o de alta resistencia eléctrica. Deje que el motor se enfríe durante al menos 15 minutos. Mientras se enfría, compruebe que la embarcación está correctamente alineada en el remolque y que no se atasca en una litera o rodillo. Inspeccione también las conexiones eléctricas en busca de cualquier signo de soltura o corrosión que pudiera estar causando una caída de tensión.
-
¿Se puede instalar un cabrestante eléctrico en cualquier tipo de remolque? Sí, un cabrestante eléctrico puede instalarse prácticamente en cualquier remolque que tenga un soporte de cabrestante estructuralmente sólido. La clave está en asegurarse de que el soporte sea lo suficientemente fuerte como para soportar las fuerzas y de que haya una placa plana adecuada para montar el cabrestante de forma segura. Los remolques más antiguos o menos resistentes pueden requerir el refuerzo o la sustitución del soporte del cabrestante.
-
¿Con qué frecuencia debo inspeccionar el cable del cabrestante? Debe realizarse una breve inspección visual antes de cada uso. Busque signos evidentes de daños, como hilos rotos en un cable de acero o deshilachados en un cable sintético. Al menos una vez al año debe realizarse una inspección más exhaustiva y completa, desenrollando todo el cable.
Conclusión
La instalación de un cabrestante eléctrico en un remolque de barco es una mejora transformadora, un esfuerzo que sustituye el esfuerzo físico por un control sin esfuerzo. Sin embargo, esta comodidad se basa en un trabajo meticuloso y en el conocimiento de las fuerzas mecánicas y eléctricas en juego. Avanzar en el proceso con espíritu metódico -desde los cálculos iniciales para seleccionar la unidad adecuada hasta el par de apriete final de los pernos de montaje y el sellado de la última conexión eléctrica- garantiza un resultado que no sólo es funcional, sino también profundamente seguro y fiable. La verdadera recompensa de este proyecto no es el cabrestante en sí, sino la serena confianza que inspira. Es la tranquilidad de saber que, al final de un largo día en el agua, la tarea de llevar la embarcación a casa se realizará sin problemas, de forma controlada y sin esfuerzo, como testimonio del cuidado y la precisión invertidos en la instalación.
Referencias
H-Lift Industries Co Ltd. (2025). Productos. H-Lift. Obtenido de
Konecranes. (2025a). Polipastos eléctricos de cadena. Konecranes. Obtenido de
Konecranes. (2025b). Polipastos eléctricos de cadena. Konecranes. Obtenido de
Lift-Sling. (2025a). Polipastos manuales de cadena-Serie HSC. Eslingas de elevación de China. Obtenido de
Lift-Sling. (2025b). Guía de seguridad de eslingas de cadena y cadenas de elevación. Eslingas de elevación de China. Obtenido de https://www.lift-sling.com/the-safety-guide-of-chain-slings-and-lifting-chain.html
SafetyLiftinGear. (2025). Tipos de polipastos: ¿Cuál es el polipasto adecuado para usted? SafetyLiftinGear.com. Obtenido de https://www.safetyliftingear.com/news/post/types-of-hoist
VEVOR. (2025). Polipastos de cadena VEVOR - Soluciones de elevación fiables para todos. VEVOR. Obtenido de